WooCommerce Service Plugin: How to Sell Services Online
What is a WooCommerce Service Plugin? And, how do I use that to sell my services online? Well, don’t worry, we are gonna answer all of these questions for you in this blog.
Selling services online has become increasingly popular over the past few years. It’s not just for small businesses anymore! In fact, many big companies are using online selling as part of their overall strategy.
Online selling is great because it allows you to reach customers who might never find you. But how do you get started with online selling? This guide will teach you everything you need to know to sell services online successfully.
So, let’s jump right into it.
What is WooCommerce Service Plugin?
The WooCommerce service plugin is an extension of the WooCommerce e-commerce platform. The WooCommerce service plugin enables users to create and manage their own professional service websites.
It can be used to sell any type of service, including but not limited to:
- Graphic Design
- Web Development
- SEO (Search Engine Optimization)
- Social Media Marketing
- Digital Marketing
- Content Writing
- Print-On-Demand Products
Introducing Woo Sell Services
With the introduction of the WooCommerce service plugin, you can now easily set up your own professional service website. You can even add multiple products to your site at once.
This means that you can start selling your services without having to build one from scratch. All you have to do is install Woo Sell Services on your WordPress website. Then, you’ll be able to create a new product or edit an existing one.
Benefits of Selling Services Online
There are several benefits to selling services online. For starters, there is no inventory management involved. So, you won’t have to worry about storing and shipping products.
Additionally, you don’t have to deal with customer returns. If a client isn’t happy with the work you’ve done, they can simply contact you directly. There’s also no risk of losing money if a client doesn’t pay on time.
You can also charge more than what you would normally charge for a product. That way, you can make more money per sale.
What will my customer see on my website?
Your customers will have to log in to your WooCommerce website. To start with that, now they will see an interface where all the services you are providing appear.
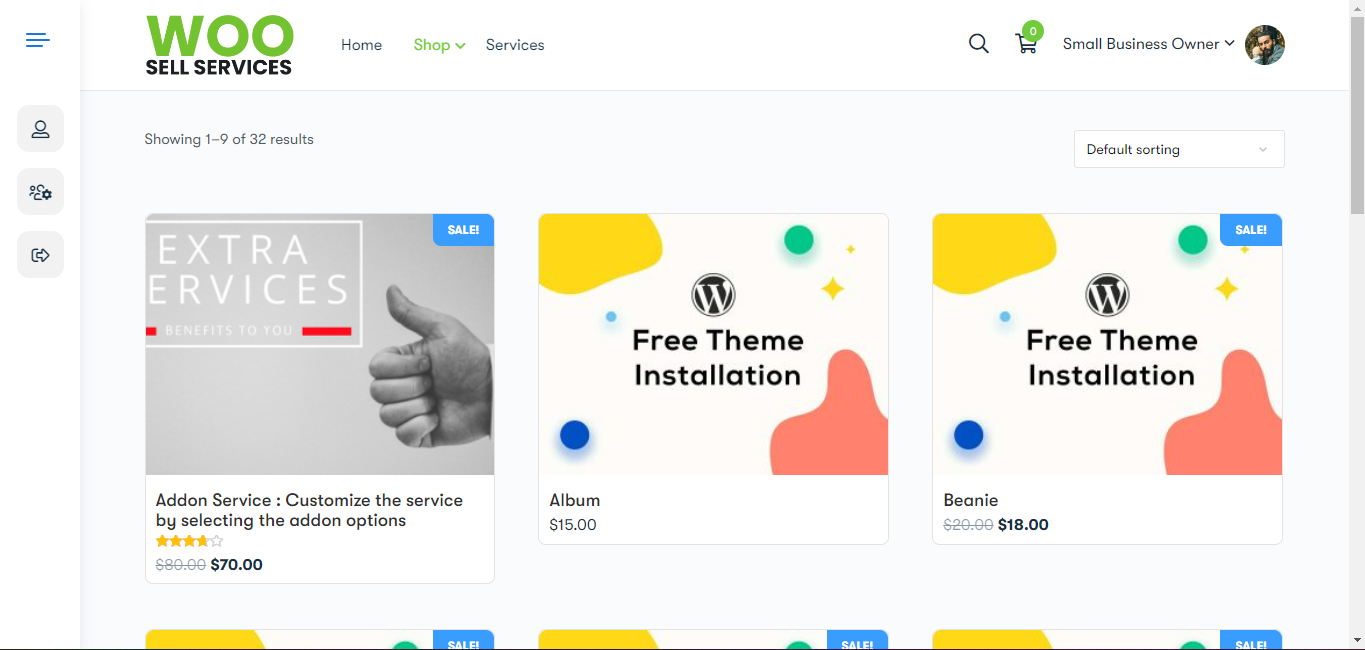
Shop Section
Customers will now see all the services that you provide, they can browse through them to select the service they desire. You can control additional stuff from the backend, such as including “on-sale” on some services to create a buzz amongst your customers.
Service Description Page
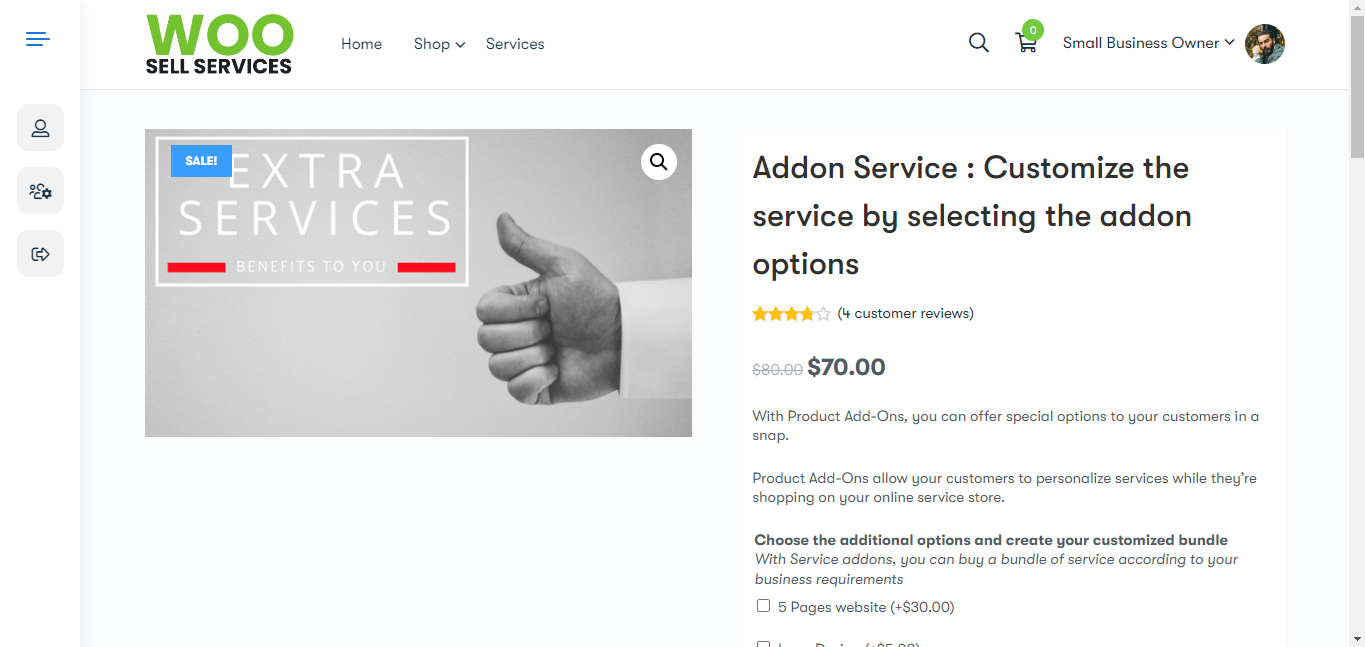
When the customer clicks on a service, they will reach the detailed description page of the service, which mentions all the tiny-tiny details of the service. From this section, the customer can even customize their service. And, for that, you need to provide them with customization or add-on options.
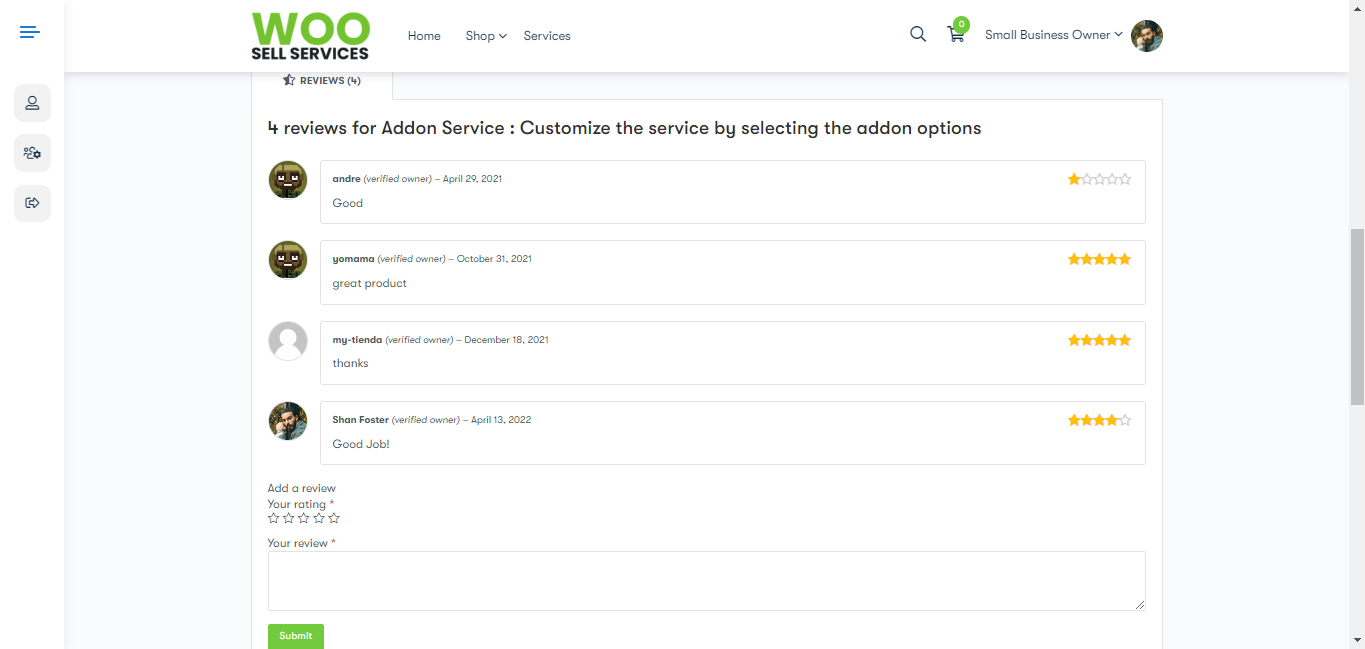
Reviews
Customers can read and write reviews for your service. Reviews matter, as most people in today’s online world, look for reviews to feel right before buying a product or a service.
Shopping Cart
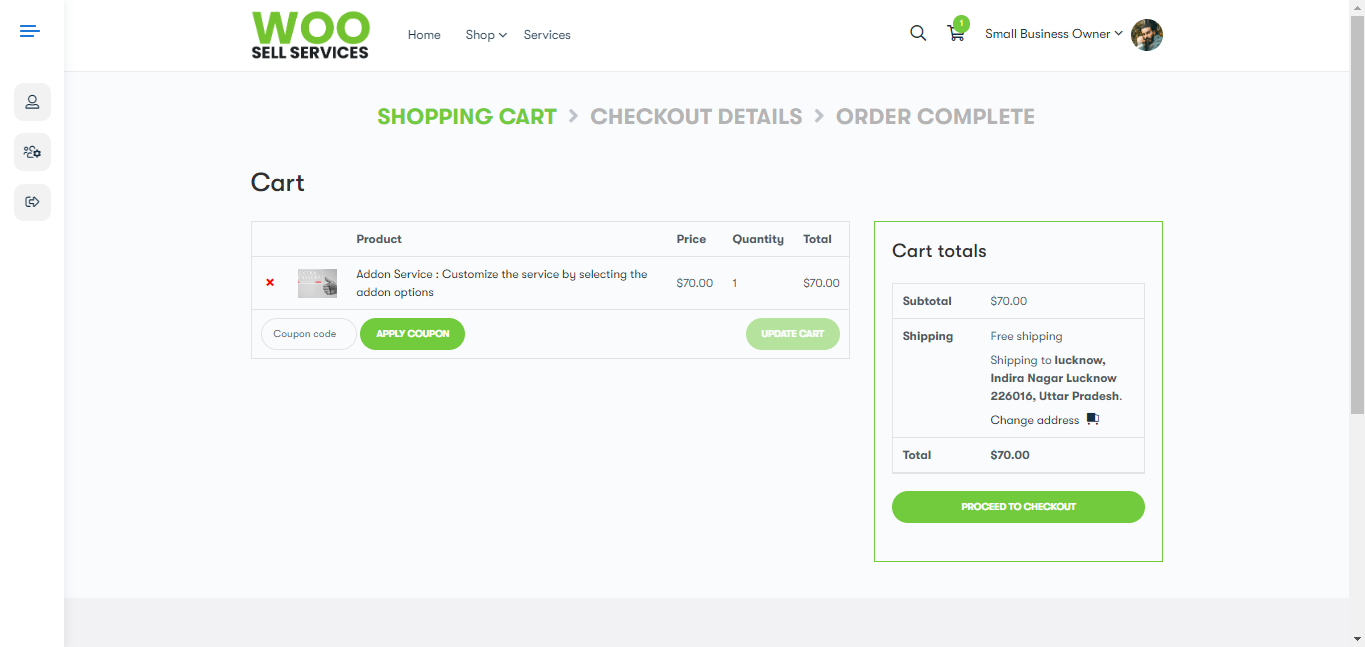
Once your customer adds a service to the cart, they can visit the cart to further step up the purchasing process. From that section, they can add their address and review all the shipment and checkout details.
Checkout
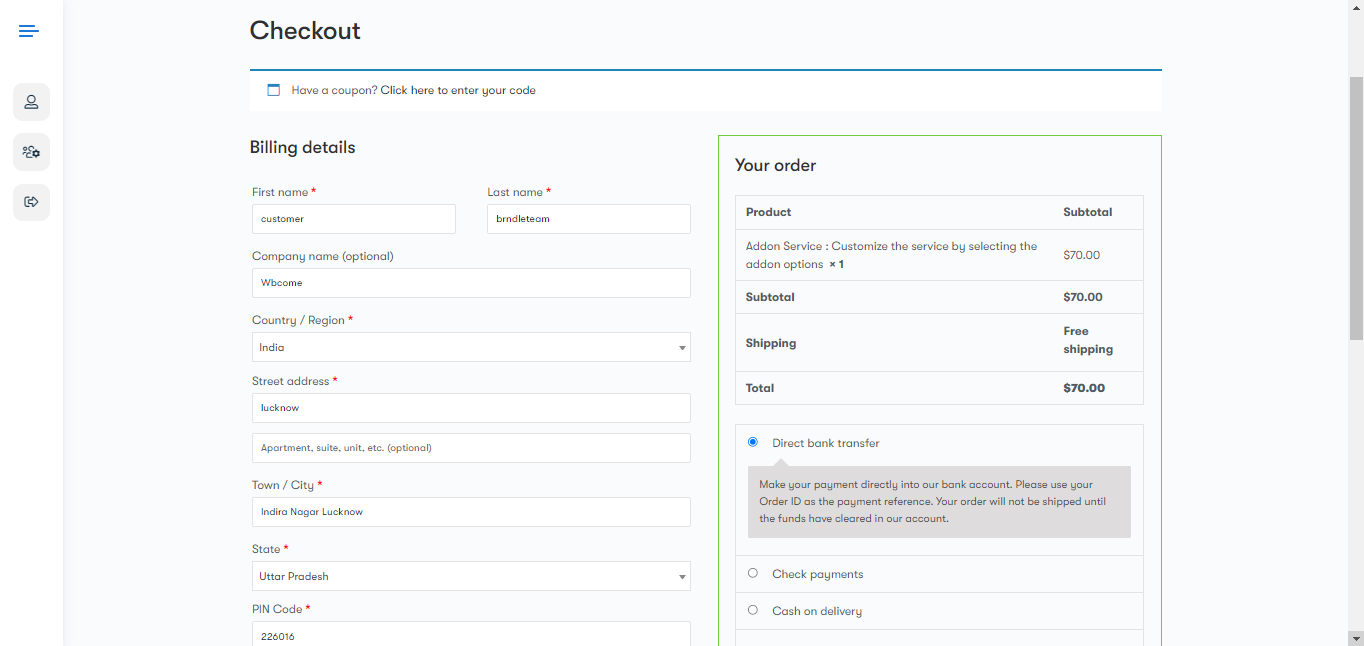
After completing all other requirements, the customer will be redirected to the checkout section. The customer can now select the payment method and fill in the billing details. The customer can also add custom notes for their order.
Order Details
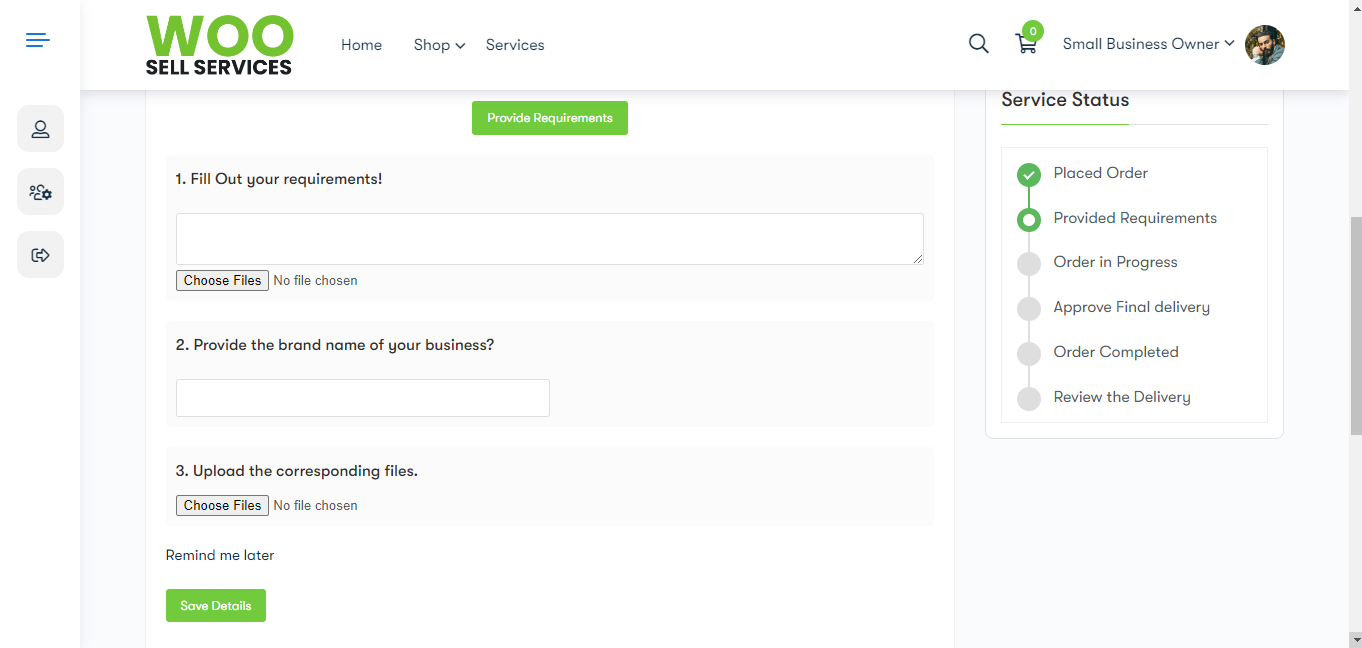
After the customer’s order is placed, a screen similar to the one mentioned above opens. It displays the current status of the order. Next, the customer has to fill in the order requirements to let the work get started.
Messaging
Your customers can have a conversation with you using the message box. It acts as a live chat between you and your customer. Your customers can upload files and ask for updates with the same.
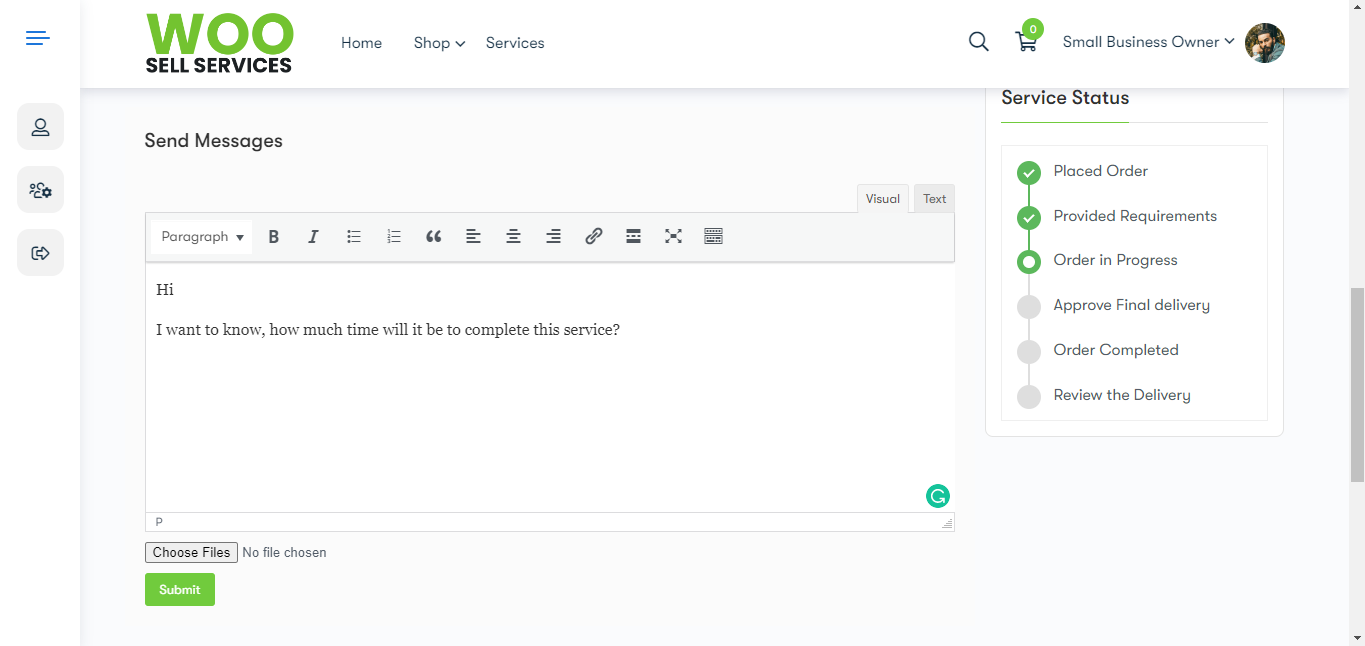
Real-time order tracking
Your customer can track their orders in real-time using the service status section. Once they have decided and placed an order they can see a status bar like shown in the below image.

Every step has a meaning and tells the customer which step the service purchasing process is. For instance, when the vendor sends a final delivery to the customer, the service status will show “approve final delivery”, and once the customer approves it, the order will automatically be considered completed. Additionally, a message will be sent to the customer to review the delivery! Also, the customer can ask for additional help throughout the service by sending messages via the messaging box.
What does the backend look like for the website owner?
The backend is super easy-to-use and interactive. All the features can be easily understood with a switch on or off settings bar!

General Settings
General settings include all the basic settings required to run a service-selling business. Woo Sell Services automatically ticks the options which are necessary for your business. However, you can freely change that later on according to your requirements!
- Services email notification
- Conversation email notification
- Conversation notification – Any messages sent by the customer will pop up on the vendor’s screen. Also, the vendor can click on that notification to open up the conversation.
- Enable review sync with woo reviews – A product review made by the customer after the completion of delivery will automatically add up to the product review section, visible on the product description page.
- Redirect to conversation page – You can turn this setting off, if you’re looking to set up a custom thank you page, or if you have some intermediate steps in between.
- Send email to additional vendor/support agent/co-author
- Enable the live conversation – It is not a live chat but yeah it will refresh the page every 5-10 seconds. Every new message will be updated within the first 10-15 seconds.
- Enable notifactions to additional vendor/support agent/co-author
- Enable to show additional vendor/support agent/co-author on frontend form
- Order Service Detail Page – It is a template-driven page on which we are displaying all the conversation threads. So, there is no need to make a change to this setting.
- Notice – Payment not processed – You can send automated messages to customers that their payment has not been processed and they must contact the vendor or site admin for further clarifications.
- Notice – Service not active – Display notices on the single service order page when the order has been “Cancelled, Refunded or Failed”
- Seller Roles – You can select all the seller roles from this section. For instance, if you are using a third-party plugin on your website like Dokan, it will automatically integrate the vendor role in this section. So that your vendor can sell services and products using Dokan.
- Send Customer Notification – Sends a customer notification if the customer has not filled up the order requirements. You can set the time in which this reminder has to be sent.
- Auto Complete Service Order After – It may happen that your customer might not be replying after the completion of the order. So, this setting allows the order to be marked as auto-completed after a day limit.
- Conversation background color – You can match the color and style of your conversation page with the design of your brand, or website.
- Conversation text color
- Conversation status background color
- Conversation status text color
These are all the general settings offered by Woo Sell Services! Now let’s take a look at other settings available in this software.
Images

You can change the images showing every order purchasing step for your customer.
Emails

This function allows you to send emails to the site admin, vendor, or customer respective of the topic and need of the email. All of these emails are available as default, however, you can overwrite them by clicking on “manage”. You can either enable or disable them, for example, you might want to disable them if you are using third-party software for email notifications.
How a service provider will interact with your service marketplace?
In this section, we will examine how the service provider will interact with your service marketplace. There are different ways, one of which is editing service details.
Adding service or a product

Adding a service is quite similar to adding a product, however, there are a few changes. The way to set up service is by clicking on the Service, Downloadable, and Virtual checkbox present while editing your product. This will add a new section to your product description page and it should look like this.

Now, all you need to do is fill in the estimated time in delivery (days), and a few questions targeting the service. Rest you have to fill in normally, similar to adding a product on your WooCommerce website.
Frontend for vendor/site admin
Select “service provider” under “my account” and you will get all the orders in a list view. You can open each thread to open the conversation with your customer.

Once the customer provides you with their requirements, you can start working on the service. And, after that you need to attach the final documented file for that service and mark “is it final delivery” as yes while sending it in the chat box. Then the message will be sent to the customer for approval and once they approve the service the order will be marked as completed. Also, a review option is given for the customer to rate your service overall. Note: the customer can message you if they face any problems during the service purchase. They can send files, images, notes, and text messages for the same.
Wrapping Words Up
In conclusion, if you have a skill or talent that others could benefit from, then you should consider selling your services online. You can try a demo of the Woo Sell Services and log in on the demo as a customer or a vendor. Additionally, you can contact our developers if you have any questions regarding the same.
Also Read: WordPress Stories Plugin: The Easiest Way to Engage your community members