How We Update Five Live Sites Without Breaking Them
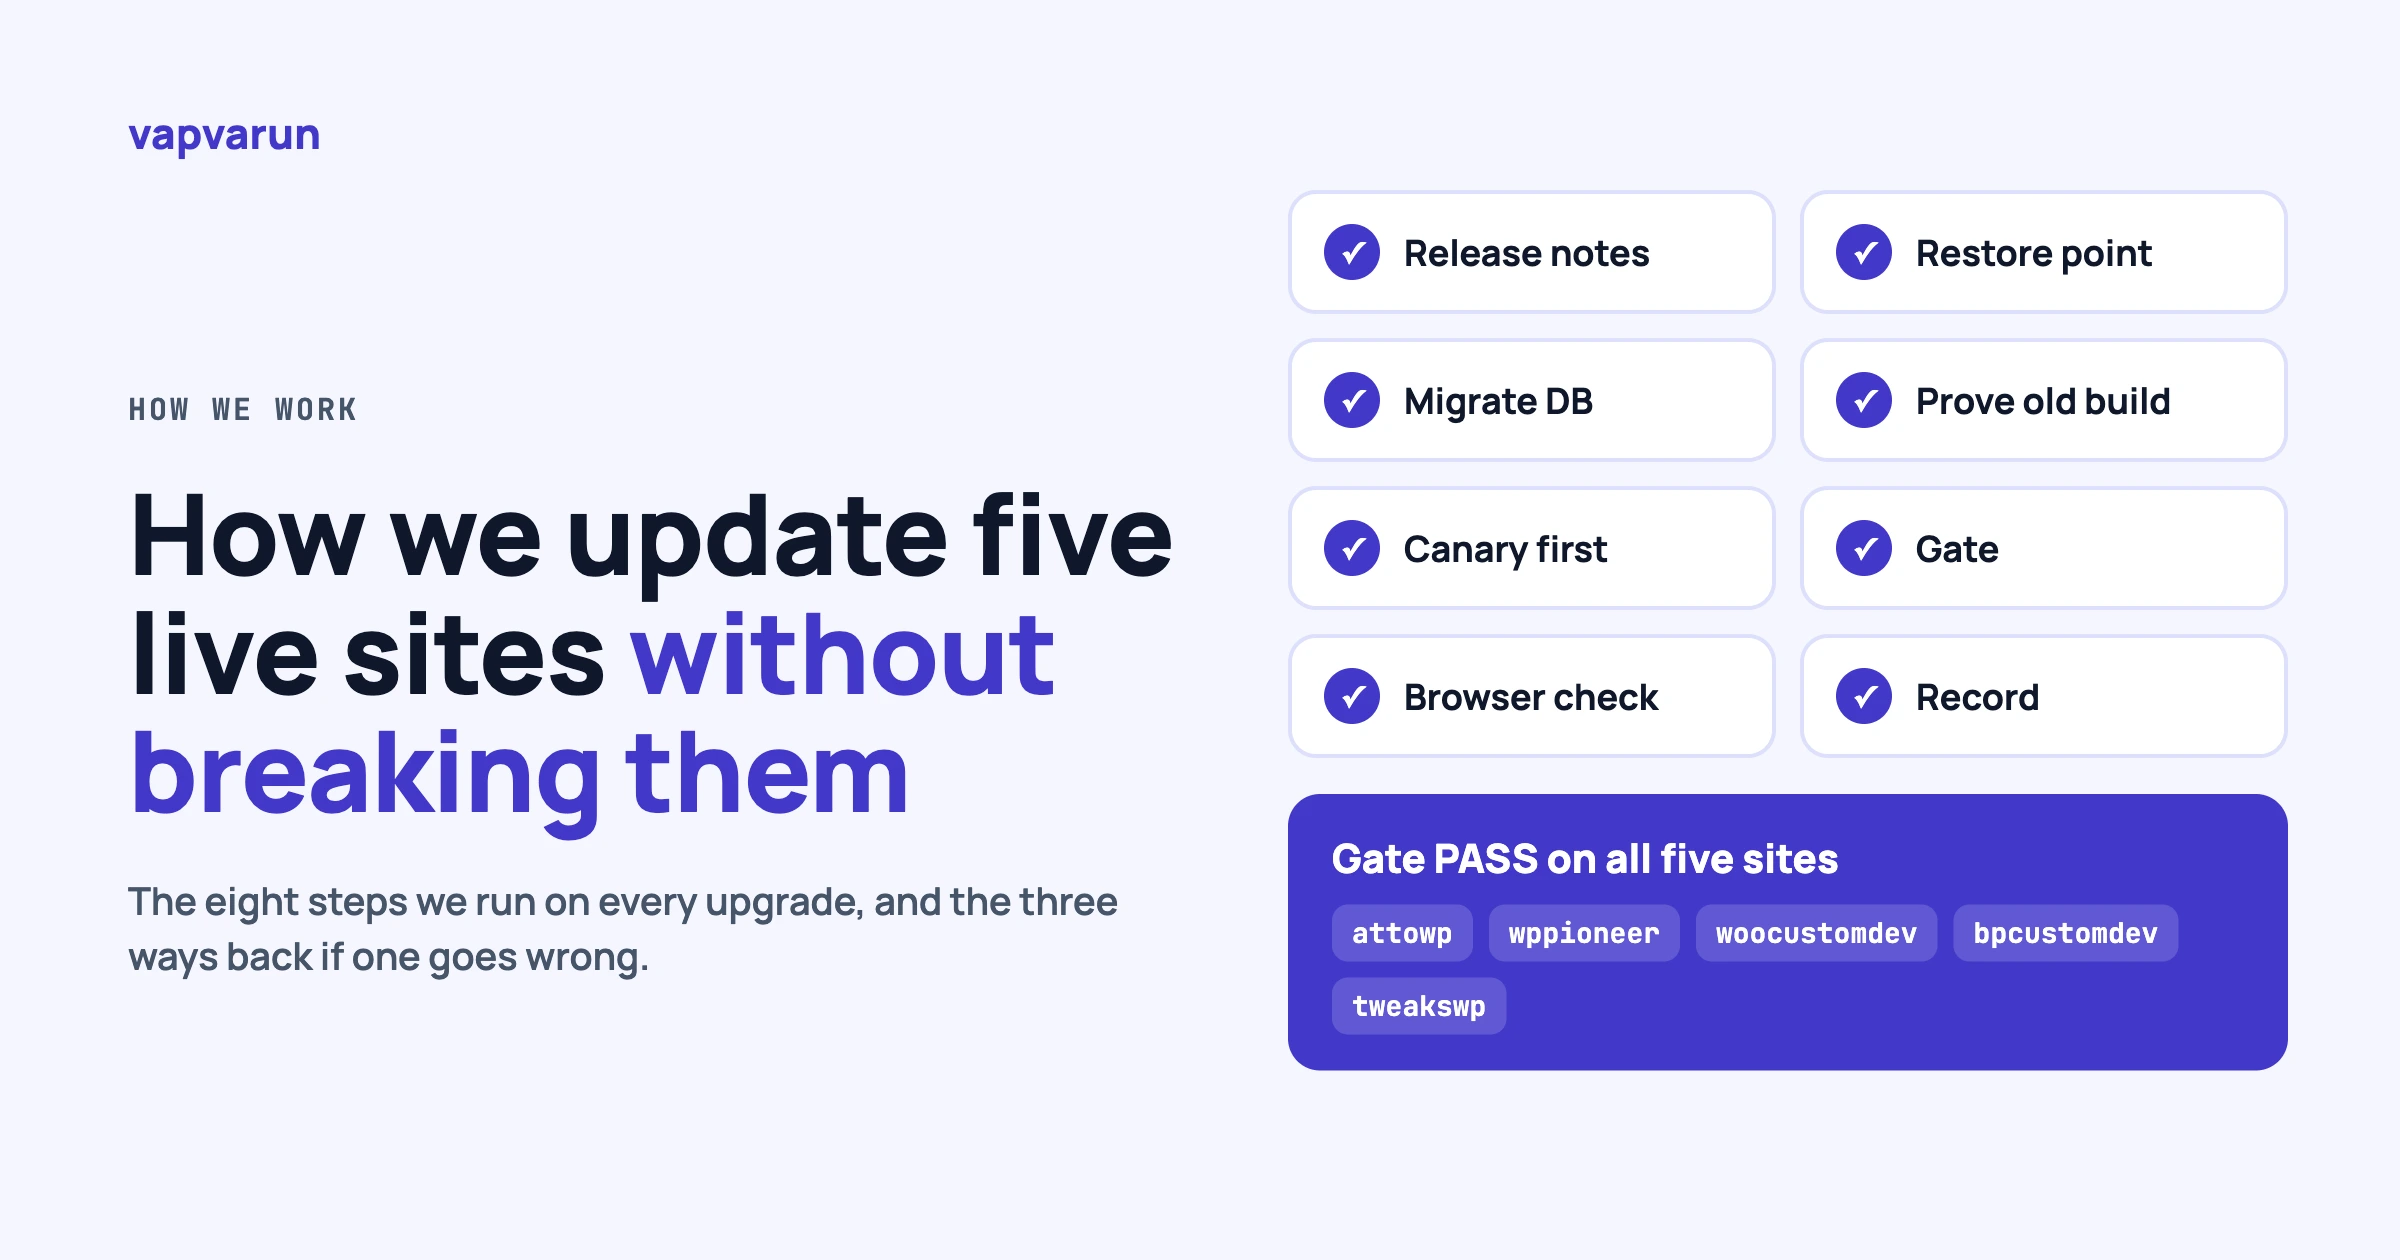
To update a live website safely, change the database before the code, keep a restore point at every step, and check the result with both a tool and a browser. Updating a live website is risky because three things can change at once: the code, the database, and what visitors already have cached. We cut that risk by changing them in a fixed order and letting an automatic check compare every public page before anything is promoted.
This is the exact routine we used on 4 October 2026, when we moved five live EmDash sites from 1.0.1 to 1.1.0. The steps work for any CMS. WordPress owners can follow the same order with core, plugin and theme updates.
In this guide
- Why updates break live sites, in plain words
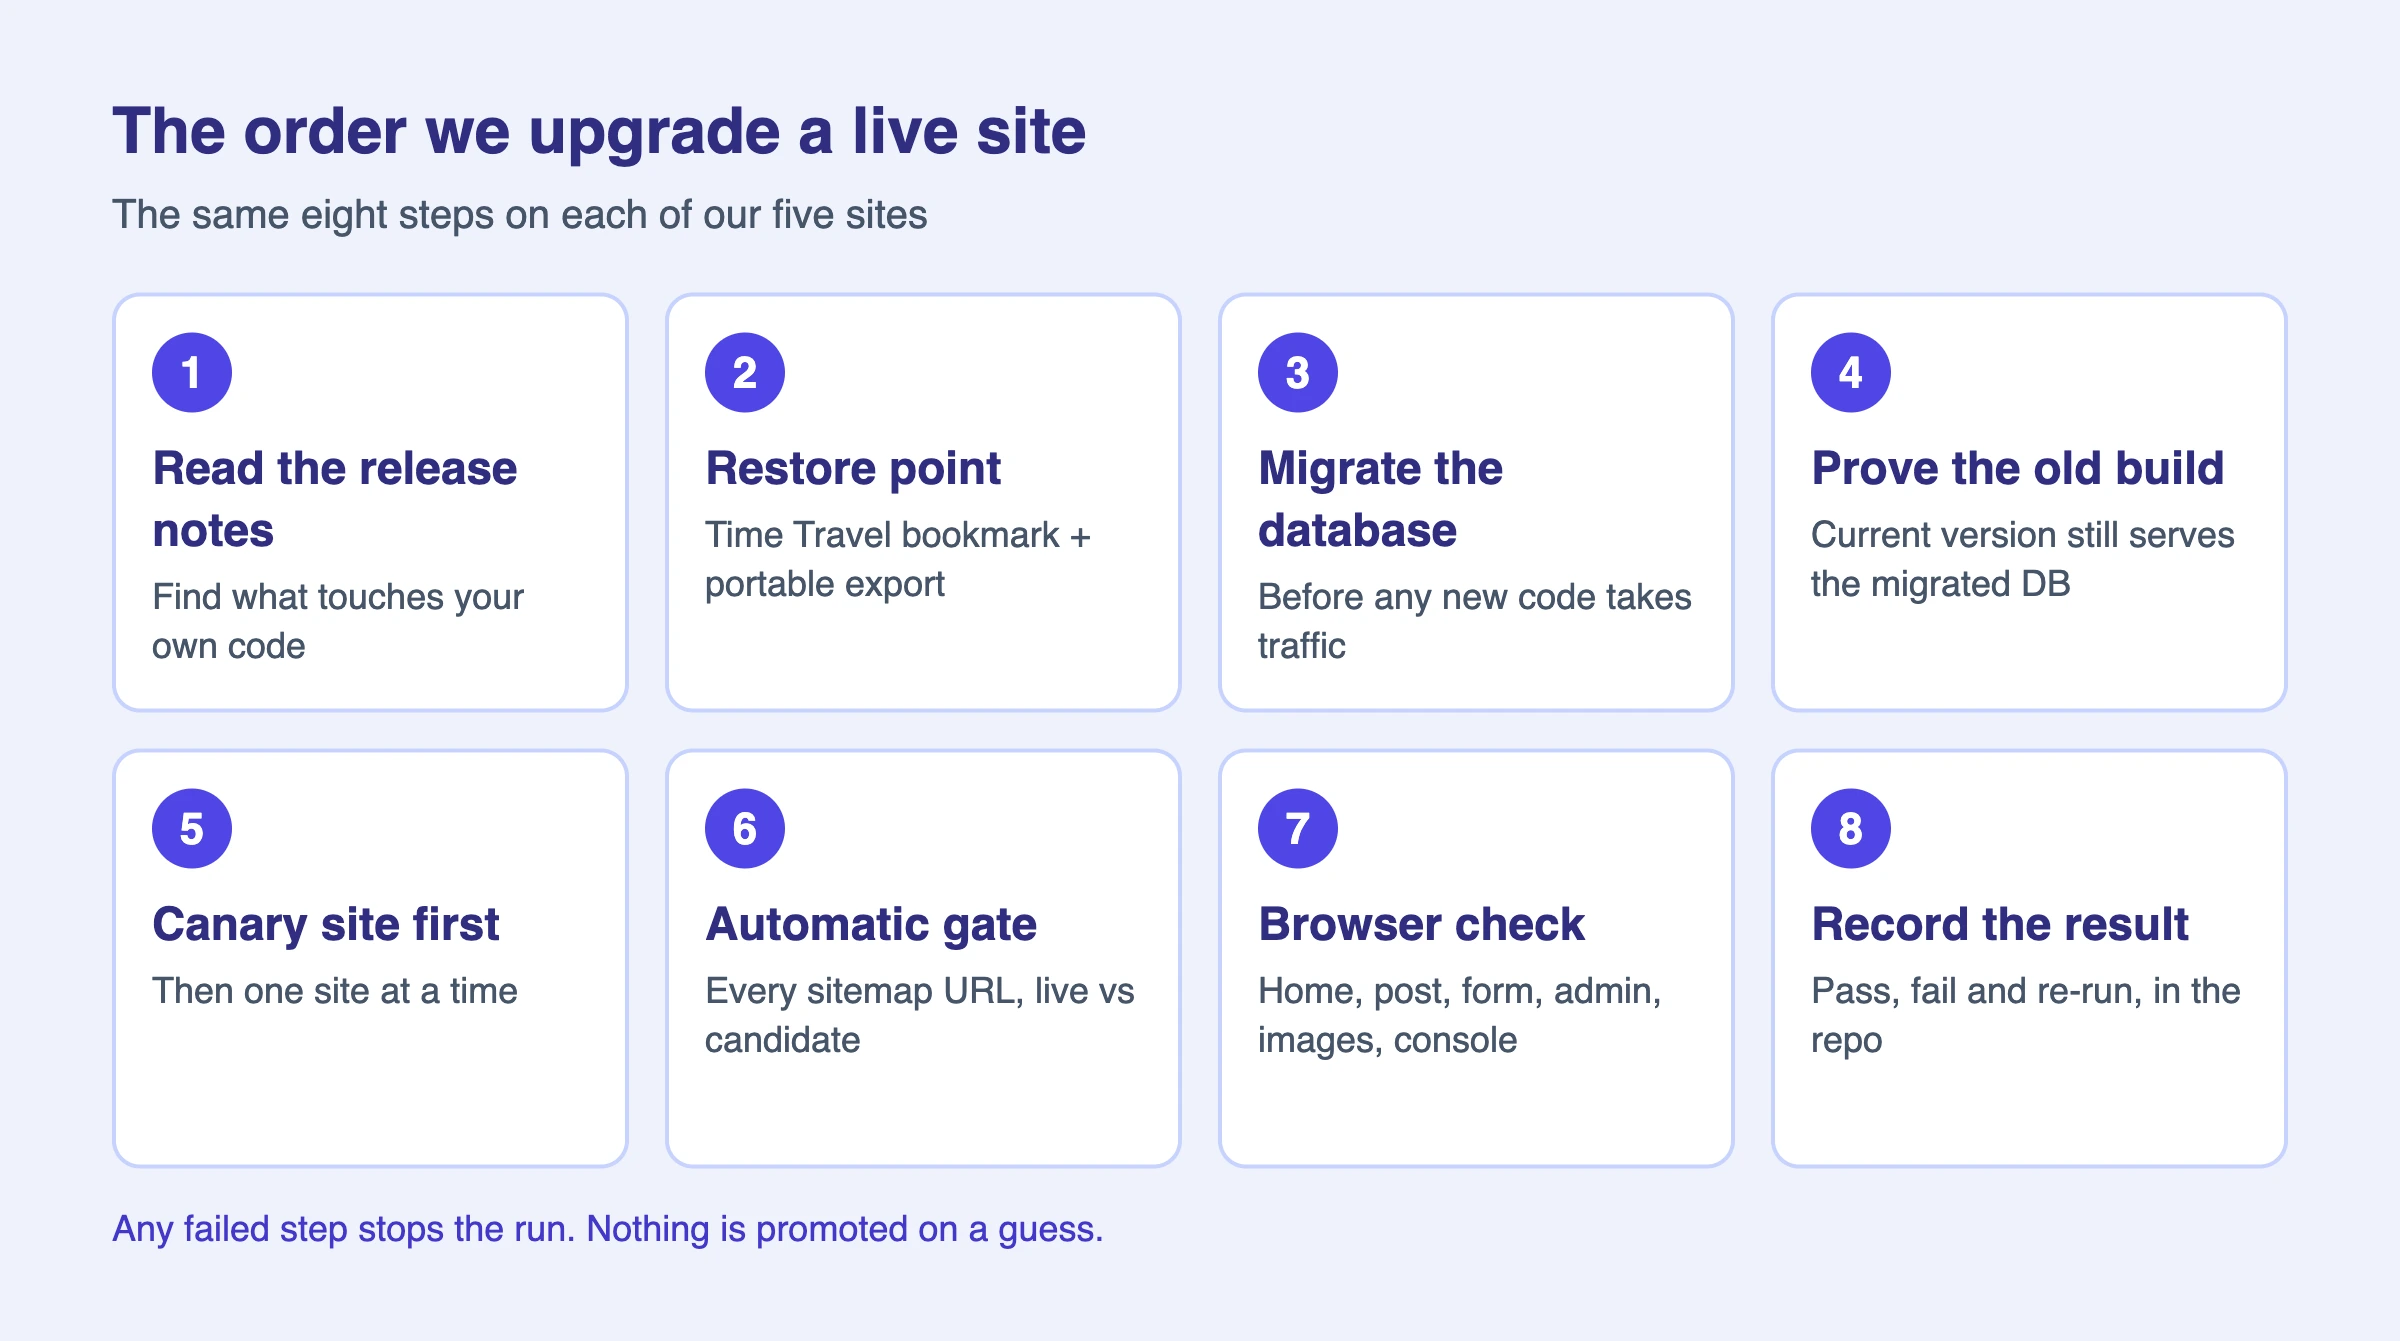
- The eight steps we run on every site
- What the gate and the browser check caught (and what they missed)
- A checklist you can copy
- The commands, for developers
Why do updates break live websites?
Updates break sites when new code meets old data, old code meets new data, or a cache keeps serving the old version. Most failures are not bugs in the update. They come from the order things happen in.
Think of three layers. The code is what you install. The database holds your posts, settings and users. The cache is the copy of your pages that visitors and your CDN already hold. An update can change all three, and they never change at the exact same moment.
Here are the usual ways it goes wrong:
- The database changes first. A new version adds a table or column. If the old code is still running, it may fail on the changed data.
- The code changes first. The new code expects a column that does not exist yet, so the first visitor triggers the change while the site is live.
- Your own code meets a new feature. You overrode part of the product, and the update changes what that part is supposed to do.
- Cached pages hide the problem. The home page looks fine because it is cached. A page nobody has opened yet is broken.
Our routine answers each one. Release notes catch the overrides. Migrating before deploying fixes the order. The gate and the browser check look past the cache.
What should you read before you update?
Read the release notes for anything that touches code you wrote or replaced. You do not need every line. You need the lines that mention things you customised.
EmDash 1.1.0 is a good example. It added a publishing calendar, an iframe block, a Microsoft sign-in provider, and a change to HTML blocks. HTML blocks created in the editor can now carry their own CSS and JavaScript, and they render in a sandboxed iframe. The release notes say that if your site replaces the htmlBlock renderer, you must pass isolated blocks to the product’s own HtmlBlock component. Otherwise those blocks render without their styles and scripts.
Our sites do replace that renderer. We use our own component to optimise images inside HTML blocks. So that one line in the notes mattered to us, and the calendar and the Microsoft sign-in did not.
We fixed it in the shared site templates first, then pulled the fixed component into each site. Existing blocks keep rendering inline unless they are marked isolated, so nothing on the live pages changed. The fix only made sure new blocks would work.
Tip: Search the release notes for the names of things you overrode, replaced or hooked into. If a name appears, read that entry fully. If none appears, you can skim the rest.
How do you make a restore point before you update?
Take two copies before you change anything: one you can restore in minutes, and one you can read without the vendor’s tools. We keep both for every site.
The fast one is a database restore point. Our sites run on Cloudflare D1, which offers Time Travel. It lets you ask for a bookmark, then restore the whole database to that moment. We write the bookmark to a small file in the repo, ops/backups/d1-timetravel-pre-1.1.0.txt, and commit it. The script stops if the bookmark is missing.
The portable one is a plain SQL export. D1 will not export a database that has full-text search tables, and every EmDash site has them. So we list the other tables and export those one by one. The export is user data, so we add it to the repo’s local exclude list and never commit it.
On WordPress the same idea is simple:
# Database export before any update
wp db export before-update-$(date +%F).sql

# See what would change, without changing it
wp plugin list --update=available
wp plugin update --all --dry-run
Two copies sound like a lot. The first is for speed and the second is for the day the first one fails. Each takes about a minute.
Why do we migrate the database before the new code goes live?
Because the database change is the part you cannot easily undo, and it should happen while no visitor is waiting on it. If the new code runs the change on the first request, that visitor pays for it, and a timeout half way can leave the database in a mixed state.
EmDash 1.1.0 came with two core migrations: 090_redirect_enable_loop_guard and 091_redirect_artifacts. We ran them from the command line, before deploying, against the production database. Each site took about 50 seconds.
The sequence for each site was:
- Run a read-only status check and confirm the target database is this site’s, not another one’s.
- Copy the target fingerprint from that output.
- Run the migration with the fingerprint, so it refuses to touch any other database.
- Run the check command and confirm nothing is pending.
The fingerprint step is the one people skip. It costs nothing and it stops the worst mistake in a fleet: running the right command against the wrong site.
Prove that the old version still works on the new database
Right after migrating, and before deploying anything, we load the live site as it is. The home page, the sitemap and the feed must all answer with a normal response from the database that was just changed.
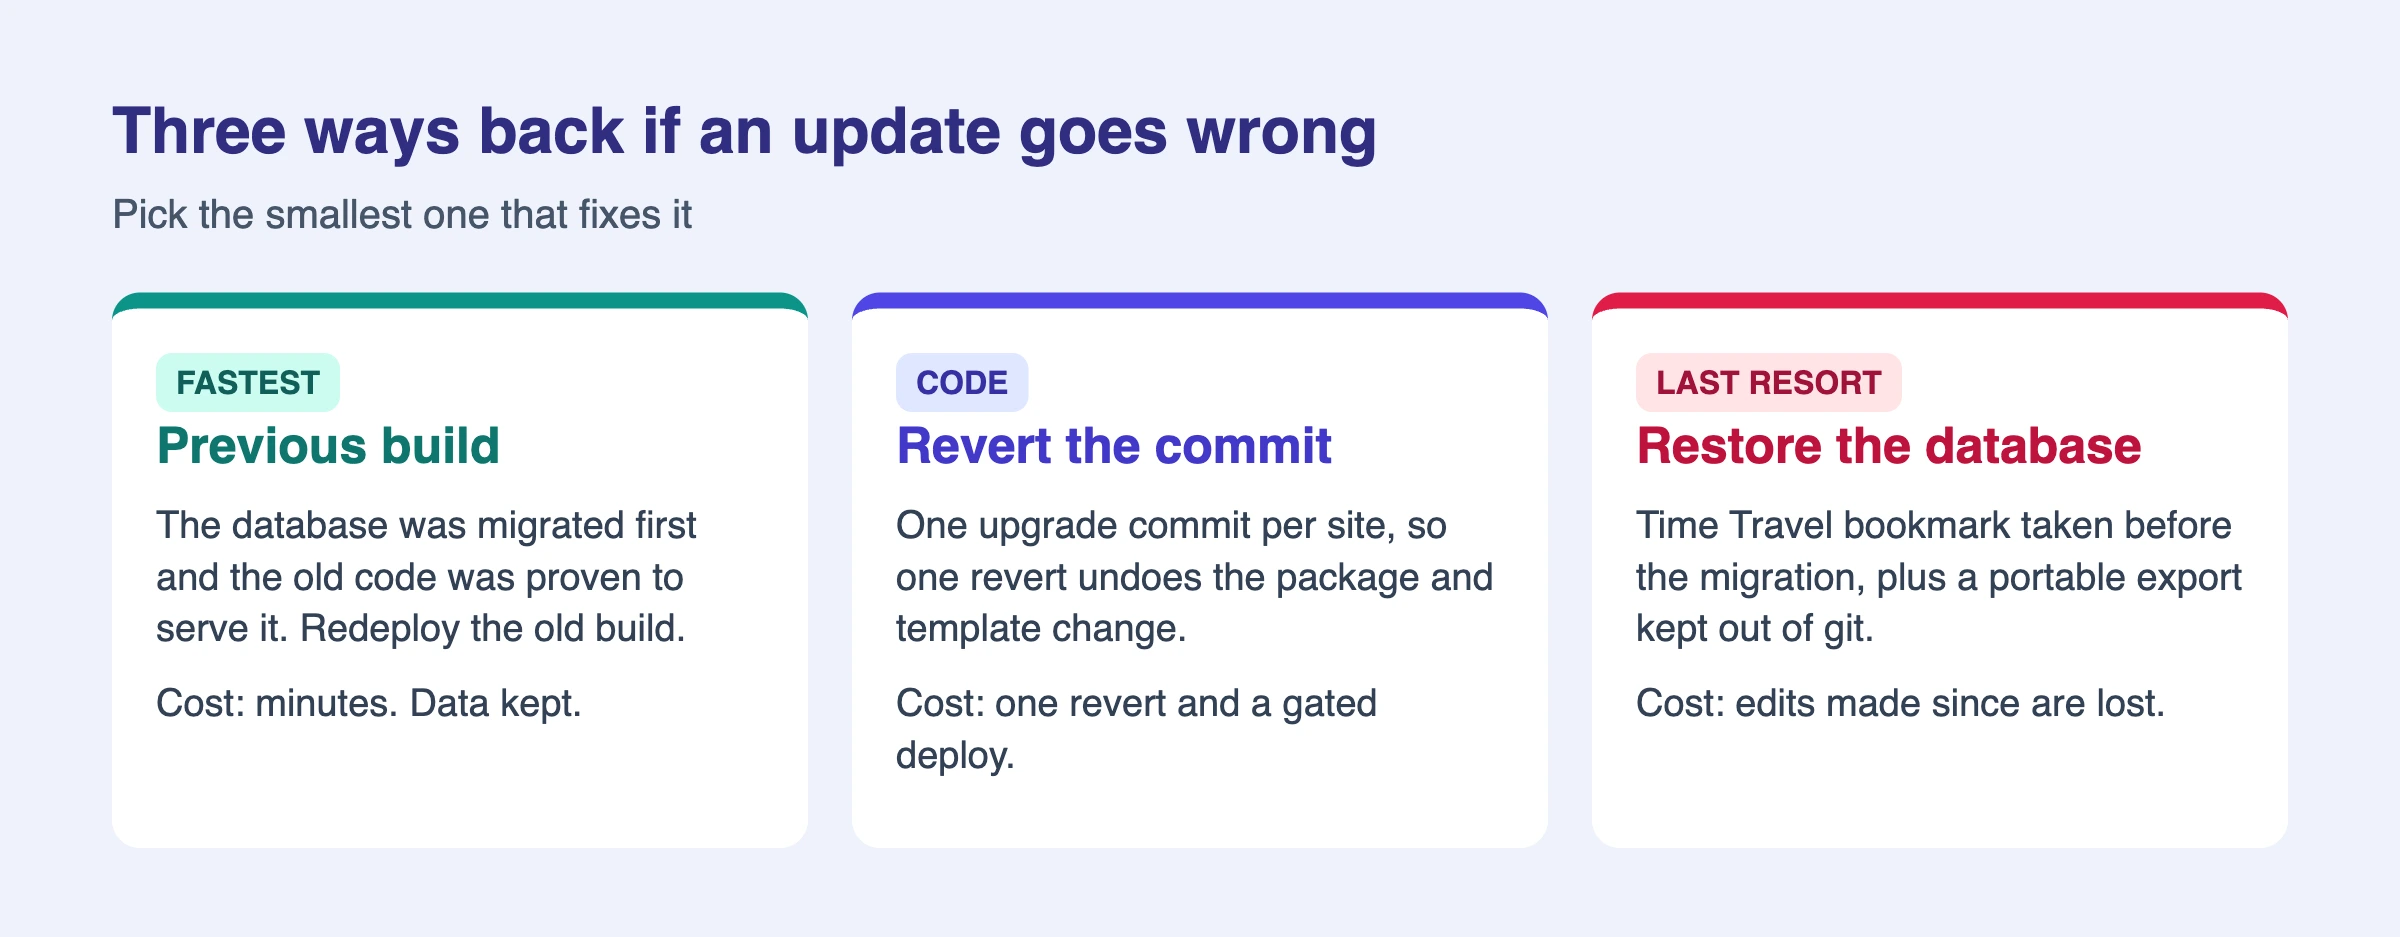
This is the step that gives you a real rollback path. If the old build still serves the migrated database, then undoing the deploy is a quick redeploy, not a database restore. If it does not, you have just learned that before any visitor could.
Which site do you update first, and who else is touching it?
Update the least important site first, then one site at a time, and tell everyone else to stay out. We call the first one the canary. For this run it was tweakswp, which has the smallest audience of the five.
The “stay out” rule matters more than it sounds. Our sites are worked on by more than one person and more than one automated session. A teammate pulling shared template changes while an upgrade is half done can wipe uncommitted work. Before we start, we announce the window and ask the other sessions to leave those repositories alone. We release them when the last site is done.
Doing one site at a time also gives you a free test. If something odd shows up on the canary, you stop with four sites untouched.
What does the automatic gate check?
The gate compares every URL in the sitemap on the live site against the new build, and refuses to promote the build if anything important differs. It does this before visitors see the new version.
For each URL it compares five things:
| Check | What it catches |
|---|---|
| Status code | A page that now returns an error or a redirect |
| Title | Templates that lost data or changed output |
| Canonical URL | Duplicate-content and wrong-host mistakes |
| Schema markup | Structured data that quietly disappeared |
| Open Graph image | Broken social previews |
It then runs our page-standards audit, which must report zero required failures. Only when both pass does the new build go live.
The results on 4 October were clean, with two things to explain:
| Site | Gate checks passed | Required failures |
|---|---|---|
| tweakswp | 160 | 0 |
| wppioneer | 156 | 0 |
| woocustomdev | 157 | 0 |
| bpcustomdev | 159 | 0 |
| attowp | 156 | 0 |
What went wrong, and how did we handle it?
Two gate runs reported failures, and both were network timeouts, not broken pages. We did not override them. We checked the failing URLs by hand, confirmed they loaded, and re-ran the gate. Both runs passed on the second attempt. That happened on wppioneer and woocustomdev.
Be careful with this rule. “It was only a timeout” is exactly what a team says right before shipping a real failure. We only accepted it after opening each URL ourselves and then getting a clean automatic run. We never forced a promote.
The browser check found something the gate did not. On two sites it surfaced an older image issue: some images were returning a server error. It is not caused by this update, and it was there before. We are still investigating it, and we are not going to claim a fix until it is proven. We mention it because it shows why the gate is not enough on its own. The gate reads pages. A person looking at the page sees broken pictures.
If you take one lesson from this section, take this one: a clean automatic check and a clean human look catch different failures. Run both.
What do you check in the browser after an update?
Check the places where visitors and editors actually go, with the browser console open. Six checks take about five minutes per site:
- The home page, on a phone-sized window and a desktop one.
- The newest post, and one old post.
- The contact form: does it render and does it submit?
- The admin login. A new admin bundle can take several seconds on its first load, so wait before you decide it is broken.
- Images: scroll the page and look for blank or broken ones.
- The browser console: any red errors that were not there yesterday.
Add one check for whatever you customised. For us, that was opening a post that contains an HTML block, since that was the part of 1.1.0 that touched our code.
Warning: Do not test only the home page. It is the most cached, most visited and best-looking page on your site, so it is the least likely to show a problem.
How do you update a live website safely? A checklist you can copy
Here is the routine as a checklist. It fits a WordPress site, a Laravel app or an EmDash site, because the order matters more than the tools.
| Before | During | After |
|---|---|---|
| Read notes for what you customised | Update the least important site first | Compare key pages with a tool |
| Take a fast restore point | Change the database before the code | Open pages in a real browser |
| Take a portable copy | Prove the old version still serves | Check forms, login, images |
| Tell others to stay out | One site at a time | Write down what happened |
Writing down the result is a small step with a large payoff. Each of our sites now has a committed record of the bookmark, the commit that made the change, and the gate report. When something looks off in a month, we can see exactly what changed on which day.
What does each step protect you from?
Every step in the routine exists because of one specific failure. If a step feels like overhead, find the failure it prevents. If you cannot name one, drop the step.
| Step | Failure it prevents | Cost |
|---|---|---|
| Read the notes | An override that silently stops working | 10 minutes |
| Restore point | Data lost with no way back | 1 to 2 minutes |
| Database first | A visitor triggering a half-finished change | About 50 seconds here |
| Prove the old build | A rollback that does not work | 1 minute |
| Canary site | The same mistake on all five sites | One extra pass |
| Gate | A broken page nobody has opened yet | Automatic |
| Browser check | What a tool cannot see | 5 minutes per site |
The costs are small next to a bad afternoon. The one step that costs real attention is the browser check, and it is the one we would never drop.
How does this map to a WordPress site?
It maps almost one to one. WordPress core, plugins and themes play the part of the package update, and your database plays the same role it does anywhere else. The order is what carries over.
- Read the changelog for the plugins that touch checkout, forms, membership or caching. Skip the cosmetic ones.
- Take a database export and a files backup and confirm you can open them. A backup you have never restored is a guess.
- Update on staging first, in the same order you will use on live. Core, then plugins, then themes.
- Update one plugin at a time on anything that earns money. If something breaks, you know which one.
- Click the money paths: add to cart, checkout, login, the contact form, and a page built with your page builder.
- Clear caches last, then check again as a logged-out visitor in a private window.
The point about caches is the same one we hit on EmDash. A page that looks right to you can still be the old version. Always do the last check as a visitor who has never been there.
How do you decide a check has really failed?
Write the rule down before you start: any difference in status code, title, canonical, schema or social image stops the run, and a person has to look. That rule is cheap to follow when you are calm and easy to bend when you are tired.
When a check fails, there are only three honest outcomes. The page is broken, so you fix it and re-run. The check is wrong, so you fix the check and say so in the record. Or the failure was noise, such as a timeout, and you prove that by loading the page and running the whole gate again. “Probably fine” is not on the list.
What are the exact commands we ran? (For developers)
This section is for developers. If you are not one, you can skip to the questions at the end.
Our upgrade is a script that runs the same steps for each site and stops at the first failure. In order, it does this:
- Pull the latest changes with fast-forward only, and stop if the working tree is not clean.
- Pull the fixed HTML block component from the shared templates.
- Record the D1 Time Travel bookmark and export the other tables.
- Install the new packages.
emdashand@emdash-cms/cloudflaremust be the exact same version. - Build the site and run the type check.
- Check and apply the core migrations.
- Load the current production build against the migrated database.
- Commit and push the package files, the template fix and the bookmark file.
- Run the gated deploy.
The migration commands in step 6 look like this:
pnpm emdash migrate --status --wrangler-config wrangler.jsonc
pnpm emdash migrate --wrangler-config wrangler.jsonc \
  --expected-target-fingerprint "$FP" < /dev/null
pnpm emdash migrate --check --wrangler-config wrangler.jsonc
The status command is read-only and prints the target database and its fingerprint. The second command applies what is pending, but only if the target still matches the fingerprint. The check command confirms that nothing is left. They need a Cloudflare token that can use D1, so we use the one from Wrangler’s own login.
The commit for each site has the same message, which makes it easy to find: “Update EmDash to 1.1.0; render isolated HTML blocks with EmDash’s HtmlBlock”.
Verified against EmDash 1.1.0 on 4 October 2026, using the release notes for emdash@1.1.0 and the logs from this run.
When don’t you need all this?
You do not need the full routine for a small brochure site that changes twice a year, if your host gives you one-click staging and daily backups. In that case: take a backup, update on staging, click through five pages, then update the live site.
The full routine earns its cost when you run several sites, when you have overridden parts of the product, or when a short outage costs real money. It is also worth it when you cannot easily say who last changed what.
FAQ
Should I turn on automatic updates for everything?
For security fixes on small sites, usually yes. For anything with custom code, no. Automatic updates skip the “read the notes for what you customised” step, and that is the step that finds overrides.
How often should we update?
Monthly for normal updates, and the same week for security releases. Small, frequent updates are easier to undo than one big update after a year.
Is a staging site enough?
Staging catches code problems. It does not copy real traffic, real caches or all of your real data. Treat it as one safety net, then still check the live site after you update. Our guide on tweakswp covers the staging workflow for WordPress in detail.
What if the update has already broken my site?
Start with the smallest undo: redeploy the previous build or roll back the one plugin you just updated. Restore the full database only if the data itself is wrong. Our friends at wppioneer have a plain walk-through in how to undo changes in WordPress.
Did the EmDash upgrade change how our sites look?
No. The gate compared titles, canonicals, schema and images for every sitemap URL, and the browser check looked at the pages that matter. The visible changes in 1.1.0 are in the admin: the calendar, the iframe block and the new sign-in option.
What should you do next?
Pick one live site and write down its restore point, its update order and its five browser checks. That one page is the start of a routine. If you would rather not run it yourself, our team at Wbcom Designs handles launch, updates and maintenance in-house, so the same people who built the site also update it.
If you run EmDash, see how we got here in We Moved Five WordPress Sites to EmDash the Week 1.0 Shipped, and read the honest list of what we still want fixed in What EmDash Still Needs to Fix. For why we gate things with checks and not with written promises, see Why Written Rules Do Not Reliably Govern AI Agents.
Related reading
- How to Safely Update WordPress (Core, Plugins and Themes) Without Breaking Your Site on tweakswp
- How to Undo Changes in WordPress on wppioneer
- WooCommerce Store Operations: Staging, Migration, CDN and Database Performance on woocustomdev
- Who Owns It at 3am on this site