Featured Image Automation: The HTML + Playwright Workflow
Somewhere around image number sixty, I stopped opening the DALL-E tab. The images were not bad. They were just never right. Wrong typography. Wrong brand colors. Text that looked like a fever dream. A border that appeared on three out of four images and vanished on the fourth for no reason. And every month, another $20 charge for the privilege of inconsistency at scale.
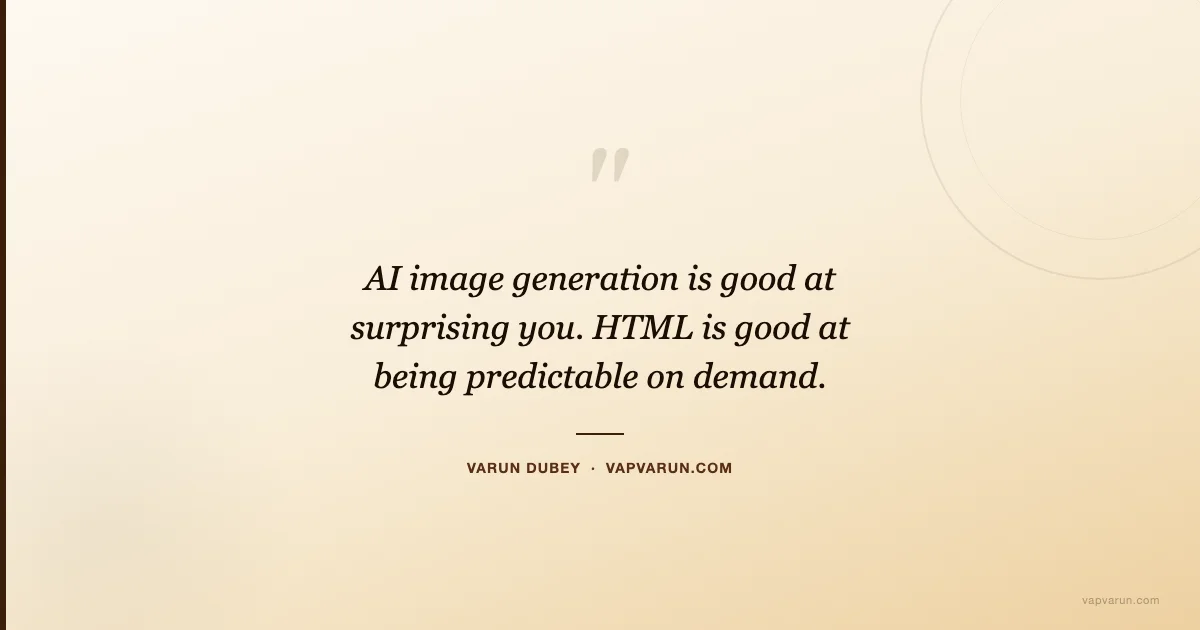
At Wbcom Designs, we run eight active WordPress properties. Each has its own brand identity, color palette, and tone. When I was relying on AI image generation for featured images, I was essentially asking a probabilistic system to memorize twelve different brand books and apply them correctly, every time, under time pressure. It does not work that way. What AI image generation is good at is surprising you. What it is terrible at is being predictable on demand.
So I rebuilt the entire featured image pipeline around HTML, CSS, and a headless browser. This post is the honest account of why I switched, exactly how the workflow runs, and the starter template you can adapt for your own properties today.
Why AI Featured Images Fail at Scale
I want to be fair to AI image generation tools. For one-off creative work, for concept exploration, for a post a month, they are genuinely useful. The failure mode is scale combined with brand constraints. Here are the four specific problems we ran into.
Text rendering is still broken
Every featured image on vapvarun.com carries a title and often a short subheading. When I asked DALL-E or Midjourney to render these, the results were what the AI community charitably calls “hallucinated text.” Letters reversed. Words merged. Apostrophes replaced by symbols. In two years of testing across multiple models, I never found a reliable way to get correct text in an AI-generated image without a post-processing compositing step – which defeats the point of using an AI generator in the first place.
The compositing workaround is: generate a background, then use ImageMagick or Photoshop to overlay the text as a separate layer. This is perfectly valid. It is also exactly what the HTML approach does, except HTML is infinitely more controllable, version-controlled, and free.
Brand drift compounds across a portfolio
Our site vapvarun.com uses warm cream backgrounds and Georgia serif typography. Our site attowp.com uses dark backgrounds with code-editor aesthetics and blue-purple accents. Our site wppioneer.com is bold with startup energy. Maintaining those distinctions through AI prompts is a losing game. Even with highly engineered prompts, the model interprets instructions differently run to run. The attowp purple shifts to lavender. The vapvarun cream goes too yellow. Small drifts that individually look fine but across fifty images create a visual incoherence that undermines brand recognition.
With HTML and CSS, the colors are hex values. They do not drift. `#3B1F0A` on vapvarun is `#3B1F0A` on every single image, forever, because it is in a file in the repository.
Cost at scale is not trivial
DALL-E 3 via the OpenAI API costs $0.040 per image at 1024×1024 standard quality. At the volume we run: eight sites, two to three posts per site per week. That is forty to sixty images per month. The API cost alone is $1.60 to $2.40, which sounds small. But we were also using the GPT-4 subscription for the team ($20/month), Midjourney for experimentation ($10/month), and periodic Adobe Firefly credits. The full bill for AI images was running $35 to $50 per month, plus several hours of human time reviewing and regenerating failures.
The HTML approach costs zero ongoing dollars. Server compute for a Playwright screenshot is negligible. The template takes an hour to build once per site, and from then on every image is free and instant.
Sameness sets in quickly
There is a recognizable look to AI-generated blog featured images in 2025 and 2026. Abstract gradients, floating geometric shapes, the same stock of glowing orbs and blurred bokeh. Readers have learned to pattern-match it. It signals “this site uses an image generator” as clearly as the old days of stock photo business handshakes. The HTML approach forces you to design something, and designed things have more visual variety than generated things, precisely because you have to think about each one.
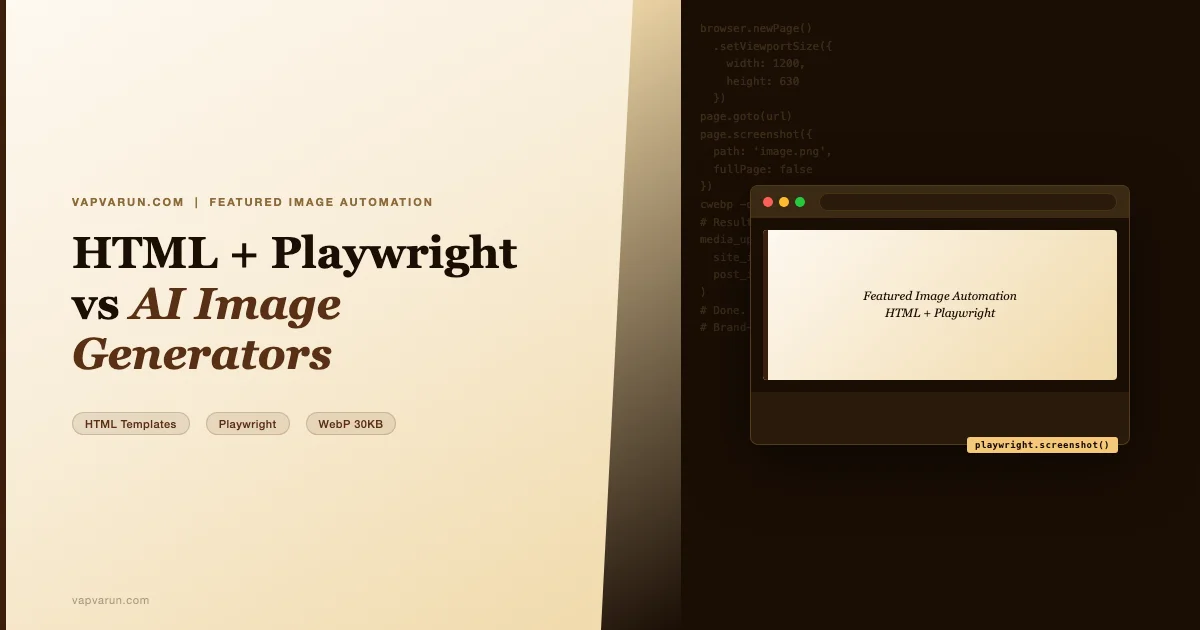
The HTML + Playwright Workflow
The workflow has four steps: write the HTML template for the post, serve it locally, screenshot it with Playwright at the correct dimensions, and upload the result to WordPress. Let me go through each.
Step 1: The HTML card template
Each site has a base template that encodes its brand. For vapvarun.com, that means Georgia serif, warm gradient backgrounds, and a consistent layout with topic pills at the bottom. Here is the template I use – simplified for clarity.
A few design decisions worth calling out. The card is exactly 1200px wide and 630px tall. These are the Open Graph dimensions that Facebook, Twitter/X, and LinkedIn all use for link previews. Using anything else means the platform crops your image unexpectedly. I set overflow: hidden on the body so nothing bleeds outside the frame regardless of title length.
The gradient is defined in CSS and keyed to each site’s palette. For vapvarun I use a warm cream-to-amber sweep. For attowp I use a near-black base with blue-purple radial accents. For wppioneer the gradient is bold orange to deep red. All of this is in the CSS, which means it is a configuration choice that never drifts.
I avoid JavaScript entirely in the templates. The screenshot tool is a headless browser, which can execute JS, but keeping the templates as pure CSS means they render instantly with no timing issues. You do not need to wait for a JS animation to settle before screenshotting.
Step 2: The Playwright screenshot
Once the HTML file is ready, I serve it from a local HTTP server and use Playwright to screenshot it. Playwright MCP tools let me do this directly from the publishing pipeline without writing a separate Node.js script. Here is the equivalent Python that the pipeline wraps:
The critical parameters are the viewport dimensions (1200×630) and the full-page flag set to false. Full-page mode captures everything below the fold, which you do not want – you want exactly the card as designed. The screenshot is saved as PNG and then converted to WebP in the next step.
One practical note: use http://localhost:PORT/ URLs, not file:// URLs. Playwright in many configurations blocks local file protocol for security reasons. Starting a lightweight HTTP server – python3 -m http.server 8765 – and serving from there avoids that entire class of issues.
In the actual publishing pipeline, these steps are orchestrated through the wp-blog MCP server. You can see how that architectural layer works in Inside a Blog Publishing MCP: The Architecture That Powers AI-Native Content Ops, where I documented how the MCP coordinates content generation, image creation, SEO meta, and WordPress posting in a single pipeline run.
WebP and the 30KB Budget
The PNG from Playwright is lossless and large: typically 400KB to 600KB for a 1200×630 image with CSS gradients and text. That is fine for the intermediate format but not acceptable for the web. WordPress displays featured images in multiple contexts: the full post header, archive grids, social sharing previews, and the REST API feed. A 500KB featured image that loads on every archive page is a performance problem.
My target is 30KB or under for the final WebP. Here is how I get there.
- Convert PNG to WebP at quality 85. For images that are primarily CSS gradients and text (high geometric regularity, no photographic noise), WebP at 85 quality is visually indistinguishable from lossless and typically achieves 90% compression over PNG.
- Avoid photos in the base template. Photographic content resists WebP compression. A simple gradient + text card at 1200×630 compresses to 20-30KB at quality 85. Add a photo and you are looking at 150-300KB even after WebP conversion.
- Use the
cwebpCLI tool. macOS ships with ImageMagick but not cwebp. Install via Homebrew:brew install webp. Then:cwebp -q 85 screenshot.png -o image.webp. This is what the pipeline runs automatically after the Playwright step. - Verify the output size. Before uploading, I run
ls -lhon the output file. If it is over 40KB, I check whether a photo or heavily detailed element crept into the template. It almost never does, because the CSS-only templates are geometrically simple by design.
The performance gain is real. Before switching to this approach, our featured images on vapvarun.com averaged 180KB (mix of DALL-E PNGs, stock JPEGs, and old ImageMagick outputs). After, the average is 24KB. PageSpeed Insights flagged featured images as a bottleneck on three posts; it has not flagged them since.
Per-Site Brand Theming
The core workflow is identical across all eight sites we run. What changes is the HTML template: the gradient definition, the font choices, the accent colors, and the layout orientation. I manage this through a site config that the publishing pipeline reads at image generation time.
Here is the breakdown of how each site’s template differs:
| Site | Background | Typography | Accent | Layout |
|---|---|---|---|---|
| vapvarun.com | Warm cream gradient, amber-brown | Georgia serif, large display size | Deep amber #3B1F0A | Left-aligned, topic pills bottom |
| attowp.com | Near-black (#0D0D0F) + blue radial glow | Menlo monospace header, sans body | Electric blue #5B8DEF | Code editor aesthetic, centered |
| wppioneer.com | Dark charcoal to rich orange gradient | Bold Helvetica Neue, high weight | Vivid orange #F5631A | Centered, large type, minimal |
| woosell.com | Clean white with subtle warm shadow | System sans-serif, professional | WooCommerce purple #7F54B3 | Right-heavy, ecommerce clean |
| buddyx.com | Soft lavender gradient | Rounded sans, approachable | Community teal #2D9CDB | Centered, social warmth |
| brndle.com | Off-white, minimal, design-system | System font stack, small caps | Ink black #111111 | Asymmetric grid, block-theme editorial |
The template system is simple: six HTML files in a directory, one per site. The pipeline reads the site_id from the calendar entry, picks the right template file, injects the post title and topic tags, then runs the screenshot. The injection is done via Python string formatting – no templating engine needed. This keeps the system simple enough that anyone on the team can modify a template by editing a single HTML file.
This same philosophy of modular, per-site configuration runs through the rest of our AI tooling. If you are curious how we wire these configurations into Claude Code agents, the Custom AI Agents for WordPress Plugin Development post walks through the full repository structure – including how site-specific rules are loaded at pipeline start.
When Stock Photos Still Win
The HTML approach does not cover every use case. There are two categories where I still use stock photos.
Real places and real people
Our site unite4india covers topics tied to specific places and communities in India. A CSS gradient card for a post about rural connectivity in Rajasthan would be absurd. The image should show the actual context: a landscape, a community, a physical space. Stock photos from Unsplash and Pexels, sourced via API, serve this purpose well. No design system can substitute for a photograph of a real place when that place is the subject.
Similarly, posts that feature an interview or a real person warrant a real photograph if one is available and licensed. The brand-card treatment works for topic posts. It does not work for person-centered content.
Country and case study posts
On wbcomdesigns.com, some posts cover specific case studies in geographic markets. We cover how BuddyPress is used for membership sites in Southeast Asia, how a plugin performs in a European e-commerce context. These posts benefit from visual grounding that connects to the geography. A CSS card with a gradient does not establish “this is a Japan market analysis” in the way an appropriate image can.
My decision tree is: does this post have a real-world referent (a place, person, or event) that readers expect to see represented visually? If yes, use stock. If the post is primarily analytical, technical, or opinion-based, the designed card is more honest and more on-brand.
Honest Costs and Limits
The HTML approach is not zero cost. Here is what it actually requires:
- Initial template design time. Building a good template for a new site takes two to four hours. You need to make real design decisions about palette, typography hierarchy, and layout. This is where most of the value is concentrated – a well-designed template produces a hundred good images, so the per-image amortized cost of that design time drops to zero quickly.
- Playwright setup. If you are running this locally on macOS, you need the Playwright MCP configured and the browser binaries installed. First-time setup is about thirty minutes. After that, screenshots are instant.
- cwebp installation. One Homebrew command:
brew install webp. Takes two minutes. - The pipeline still needs to inject the title. This is the manual variable in the workflow: each new post has a title, and you need to pass that into the template. In our automated pipeline this is handled by the wp-blog MCP server, which reads the calendar entry title and injects it at image generation time. If you are running this manually, you will do this with sed or Python string replacement.
- Creative limitation. The template is deterministic, which means every image for a given site looks like it comes from the same system. This is mostly a feature, but for posts that want a radically different visual treatment, you have to modify the template or create a variant. AI generators are better at surprise. The HTML approach is better at consistency.
After running this workflow across eight sites for roughly four months and producing over one hundred images, the assessment is clear: the template approach is faster, cheaper, more consistent, and easier to maintain than AI image generation for a brand-sensitive multi-site publishing operation. The only thing it does not do better is produce novel visual surprises – and for a featured image library, that is not the goal.
The Starter Template
Here is a fully working starter you can drop in for any site. Customize the gradient, font sizes, and accent color to match your brand. The structure and Playwright screenshot code stay the same regardless of which site you are adapting it for.
To adapt this for your own site:
- Replace the gradient stop colors with your brand palette.
- Replace
Georgia, serifwith your preferred font stack (system fonts only, no external requests during screenshot). - Replace the
TITLE HEREandTAG 1/TAG 2text with variables that your publishing script injects. - Save to
/tmp/{site}-featured/{slug}.html, serve withpython3 -m http.server 8765, and screenshot with Playwright at 1200×630. - Convert the PNG to WebP at quality 85 with
cwebp. - Upload via the WordPress media REST API and set as the post’s featured image.
The full pipeline runs from calendar entry to published post with featured image, SEO meta, tags, internal links, and indexing pings – is what the wp-blog MCP server orchestrates. If you are building something similar for your own WordPress operation, the AI-assisted WordPress testing post shows how we use Playwright in a different context (QA), which gives you a sense of how flexible this headless browser approach is across a content + development workflow.
Where This Goes Next
The next improvement I am planning is per-post layout variants within a site template. Right now every vapvarun.com image uses the same left-aligned layout. I want three or four layout options – centered, split-panel, large-type minimal, and quote-card – that the pipeline chooses between based on post category or word count. The design system stays consistent; the composition adds variety.
I am also experimenting with a version of this workflow for social cards: a 1200×628 variant for Twitter/X and a 1080×1080 variant for Instagram, generated from the same HTML template with a different CSS media query. The HTML + Playwright approach scales to any fixed-dimension output format. AI image generation does not handle arbitrary aspect ratios cleanly.
The fundamental shift is from probabilistic content generation to deterministic design execution. AI is exceptional when you want to explore a space. HTML is exceptional when you want to occupy one precisely. For featured images on a professional publishing operation, precision wins.
If you are running a WordPress agency or multi-site operation and want to see how this fits into the full content and development workflow at Wbcom Designs, the Wbcom Designs services page outlines how we approach AI-assisted plugin development, content operations, and site architecture for agency clients. The image pipeline is one piece of a larger system that keeps eight live properties running without a dedicated content team.