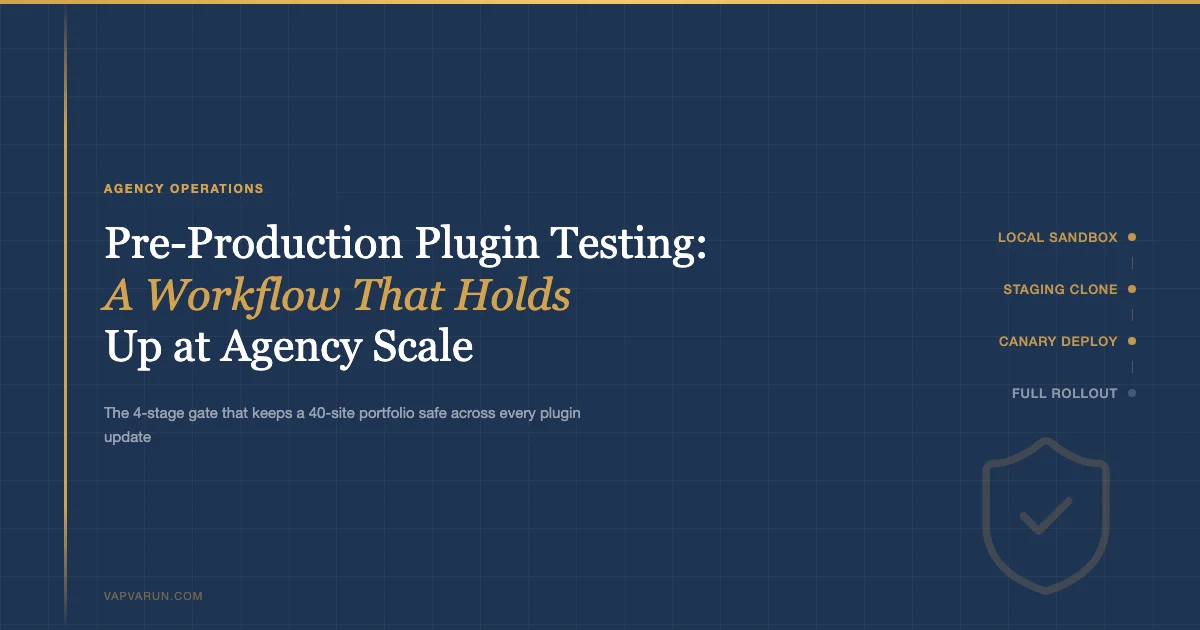
Pre-Production Plugin Testing: A Workflow That Holds Up at Agency Scale
Shipping a plugin update to one WordPress site carries a known blast radius. Shipping it to forty client sites without a test gate is a different problem entirely. The failure modes multiply: a DB migration that runs fine on a fresh install breaks on a site carrying six years of custom post meta. A hook added in version 3.2 conflicts with a theme override that three clients are running. An autoload record that looked small in staging turns out to be 2MB on a real client database, and the object cache starts behaving strangely. These are not hypothetical scenarios. They come up regularly when you maintain a plugin portfolio at agency scale.
The workflow below is a 4-stage gate. It is not a bureaucratic checklist. Each stage has a specific job, and each gate exists because a real failure mode got through without it. At Wbcom Designs, we maintain over 30 plugins ranging from BuddyX and Reign themes to community tools like BuddyPress Hashtags, Polls, and Moderation Pro. The gate applies to all of them before any production push.
The Cost of an Untested Plugin Update Across a Portfolio
A failed plugin update on a single client site is a support ticket and a rollback. On fifteen client sites it is a crisis, and on forty it is potentially a business-ending event if you are running managed hosting contracts. The economics shift fast.
Consider the downstream costs that do not show up in the immediate bug report. A payment gateway plugin that breaks checkout has a revenue-per-hour cost for the client. A membership plugin that locks members out has a churn cost. A BuddyPress component that drops activity feed data has a community trust cost that does not recover quickly. These are the numbers that make agency owners wake up at 2am.
The less obvious cost is support time. When a plugin update breaks something on a production site, the diagnostic path is slow. You are working against a live system, you cannot reproduce the issue cleanly, and you often end up running comparisons against a backup rather than against a clean test environment. A 30-minute staged test catches the same issue in a controlled environment. The math on that is straightforward.
There is also a third cost that agencies undercount: the update backlog. When you do not have a reliable test gate, the safest move feels like deferring updates. Plugins stay behind their stable release for months. Security patches do not land promptly. Eventually the debt comes due, usually at the worst time. A proper test gate actually increases update frequency because the cost-per-update drops dramatically once the process is repeatable.
The 4-Stage Gate: An Overview
The gate works as a funnel. Most issues get caught in Stage 1 at near-zero cost. A smaller number surface in Stage 2 when real data is in play. Stage 3 catches environment-specific failures. Stage 4 is the controlled rollout with a rollback path already defined.
- Stage 1 – Local sandbox: wp-env or Local, automated static analysis (PHPStan + WPCS), unit tests if they exist. Cost: minutes.
- Stage 2 – Staging clone: One production client site cloned to staging with real data. Focus on DB migrations, real meta, real taxonomy records. Cost: under an hour.
- Stage 3 – Canary deploy: Three to five low-risk production sites. 48-hour monitoring window. Cost: one monitoring review per day for two days.
- Stage 4 – Full rollout: Remaining portfolio, done in batches via MainWP or WP-CLI. Rollback plan is pre-staged before this step starts.
Security patches skip to Stage 4 directly. That exception is deliberate and covered at the end of this piece.
Stage 1: Local Sandbox with wp-env or Local
The local sandbox job is to catch code-level failures before they ever touch a database with real data. It runs three checks: static analysis, code standards, and basic functional smoke tests.
Setting Up the Sandbox
For plugin development and pre-release testing, @wordpress/env (wp-env) is the cleaner choice. It spins up a Docker-based WordPress environment from a .wp-env.json config at the repo root. You can pin the WordPress version, PHP version, and list the plugins and themes to activate. This means you can test your plugin against WordPress 6.5 and 6.6 in separate environments with two commands.
For client site testing, Local (by WP Engine) is better suited because it supports importing real database dumps. You create a site in Local, drop the client database in, and you have a near-production replica on your machine. Neither option is universally better. The right choice depends on whether you need a generic test environment or a site-specific one.
PHPStan and WPCS Gates
Static analysis runs before you install the update anywhere. For our plugins at Wbcom, the gate is PHPStan at level 5 and WordPress Coding Standards via PHP_CodeSniffer. These two tools catch different failure classes.
PHPStan at level 5 catches type errors, undefined method calls, calls with wrong argument counts, and deprecated PHP function usage. In practice, the failures we catch most often are calls to WP_Error that do not check is_wp_error() before proceeding, and deprecated filter signatures that changed between WordPress minor versions. Level 5 is the sweet spot for WordPress plugins: strict enough to catch real bugs, low enough on false positives that the gate stays green on clean code.
WPCS catches WordPress-specific issues: direct database queries without $wpdb->prepare(), unescaped output, nonce missing from form handlers, capability checks before data writes. These are the issues that become security incidents. Running WPCS as part of the pre-release gate is not optional.
For third-party plugins you do not control, skip PHPStan and WPCS and go straight to functional testing. The static analysis gate is for your own code. For vendor plugins, the local sandbox is still useful: activate the updated plugin and run through the primary user flows manually, or run the plugin’s own test suite if it ships one.
What to Script in Stage 1
The minimum script for Stage 1 runs four checks and exits non-zero on any failure. This makes it CI-compatible: you can wire it into GitHub Actions, Bitbucket Pipelines, or whatever CI system you use. The checks are: Composer install, WPCS, PHPStan, and WordPress unit tests if a test suite exists. A passing Stage 1 gate means you have a code artifact that can move to Stage 2. A failing gate means you fix before shipping anything.
The WP-CLI commands for a Stage 1 smoke test on a Local site are straightforward. See the Gist below for the full script we use for Wbcom plugin releases.
Stage 2: Staging Clone of One Production Client
Stage 2 is where code meets real data for the first time. The goal is to catch failures that only appear with actual production records: DB migration timing issues, meta key conflicts with existing data, taxonomy hierarchy problems, or conflicts with the exact theme and extension stack a specific client is running.
Choosing the Right Staging Client
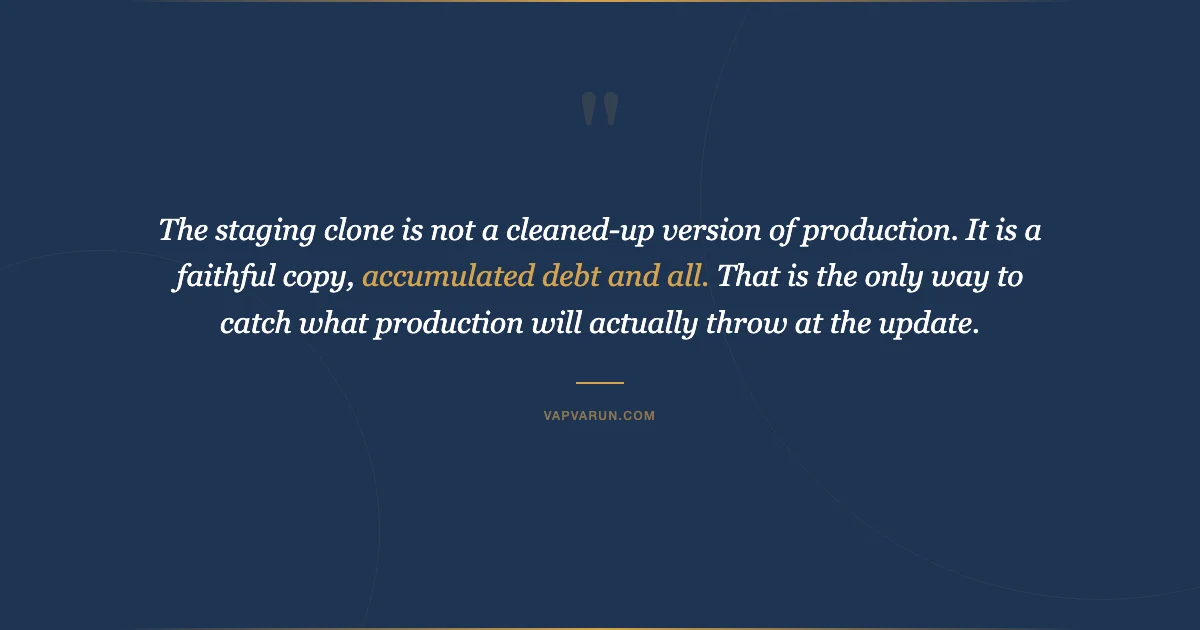
Not all client sites are equal test candidates. The staging client for Stage 2 should be the client with the lowest traffic (so a staging outage does not interrupt a real visit), the most representative data volume, and the longest site history. Six-year-old sites with accumulated custom post meta reveal migration problems that fresh test installs cannot.
The staging clone is a full copy: database, uploads, active plugins, and theme. Use WP-CLI to export and import the database. Push the files via rsync or let your hosting platform handle the clone. The key is that the staging environment is a faithful copy of production at the moment of cloning, not a cleaned-up version.
What to Check in Stage 2
After activating the updated plugin on staging, the checks follow a standard path. First, confirm the update activated without a fatal error. Check the PHP error log immediately after activation. Then run through the primary user flows for that plugin: if it is a membership plugin, create a user, assign a membership, confirm access controls work. If it is a BuddyPress component, post an activity, reply to it, confirm notifications fire.
Then check the DB. Compare the wp_options autoload payload before and after activation. If a new version adds autoloaded options that were not there before, measure the size. Anything over 100KB added to the autoload set is worth investigating. We have had third-party plugin updates add 400KB of autoloaded serialized data. That number shows up immediately in site performance, even before Query Monitor flags it.
Check the scheduled actions table if the plugin uses Action Scheduler or WP Cron. A missed migration or an improperly deregistered recurring action can cause a cron loop that is very difficult to diagnose on a live production site. Staging is the place to find it.
Stage 3: Canary Deploy to 3-5 Client Sites
Stage 3 tests the update against the variance in your portfolio. No two client sites are exactly alike. Different theme versions, different child themes with function.php overrides, different extension stacks, different PHP and MySQL versions across hosting environments. A canary deploy surfaces environment-specific failures before they become a full-portfolio incident.
Selecting Canary Sites
Choose canary sites that represent the diversity in your portfolio. If you have clients on Cloudways, WP Engine, and shared hosting, pick one from each tier. If you have clients running different theme families (BuddyX, Reign, Astra, custom), include representatives. The canary set does not need to cover every permutation. Three to five sites that span the major axes of variation in your portfolio is sufficient.
Prefer lower-traffic sites for the canary set, but not the staging candidate you already used in Stage 2. You want fresh environments. A site that gets 200 page views per day is a reasonable canary. A site doing 10,000 page views per day is not the place for a canary test unless you have a fast rollback procedure and the client has agreed to the risk.
What to Monitor for 48 Hours
The 48-hour window catches slow-burn failures: cron jobs that run once per day and fail silently, memory leaks that accumulate over several requests before hitting the limit, or cache warming issues that only surface after the object cache fully repopulates. A check at hour 0, hour 12, hour 24, and hour 48 is sufficient for most updates.
The monitoring checklist for each canary check:
- PHP error log: any new errors or warnings since the update
- Query Monitor (if installed): any new slow queries or unexpected hook calls
- Uptime monitor: confirm no downtime events
- Key user flows: login, primary plugin function, admin panel for the updated plugin
- Action Scheduler or WP Cron: confirm scheduled actions are completing, not stacking
- Object cache hit rate: any noticeable drop suggests a new cache-busting pattern in the plugin
If all four canary checks pass without new errors, the update moves to Stage 4. If any check surfaces a new error, the update goes back to the fix queue. The canary sites get rolled back before Stage 4 starts.
Stage 4: Full Portfolio Rollout with a Pre-Staged Rollback Plan
Stage 4 is the controlled push to the full client portfolio. By this point the update has passed code analysis, real-data staging, and a 48-hour canary window. The risk is low. But low-risk is not no-risk, and the rollback plan needs to be in place before the first site in Stage 4 is updated.
Pre-Stage the Rollback Before You Begin
The rollback plan has two components: a snapshot of each site before the update, and a verified path to restore from that snapshot without touching the live database manually. For MainWP-managed sites, the pre-update backup via UpdraftPlus or WPvivid is automated. For sites managed via WP-CLI, the snapshot script runs before the update loop begins.
The key discipline: take the snapshot, verify it completed, then run the update. Do not run the update and hope the backup ran on schedule. The verification step is one WP-CLI command per site, or one MainWP dashboard check. It takes ten seconds per site. It has saved real production data on at least three occasions in our portfolio over the past two years.
Batching the Rollout
MainWP handles batch updates cleanly across a large portfolio. You can filter by plugin slug, push the update to a group, and monitor the results in the dashboard. For WP-CLI workflows, the loop runs against a site list file. Either way, run in batches of ten to fifteen sites rather than all at once. Batching gives you a natural checkpoint. If the fifth site in a batch throws an error, you stop the loop, investigate, and decide whether to continue or roll back the batch.
After Stage 4 completes, run a final check pass on a sample of updated sites: five to ten sites selected at random across different hosting environments. The post-rollout check confirms the update landed cleanly and no silent failures slipped through. Silent failures are the hardest to catch because the update appears successful but some edge-case functionality stopped working. The post-rollout sample check is the last line of defense.
Tools That Make This Practical
The 4-stage gate is only sustainable at agency scale if the tooling removes friction from the repetitive parts. Three tools do most of the work.
MainWP
MainWP is the nerve center for Stages 3 and 4. It gives you a single dashboard view of plugin versions across your entire portfolio, lets you push updates to site groups, and integrates with backup plugins to automate pre-update snapshots. The extension ecosystem is mature: UpdraftPlus integration, WP Rocket cache clearing, Jetpack sync, and Yoast SEO sync all work reliably.
The feature that matters most for agency plugin management is update scheduling with pre-update backup. You configure it once per site group: before any update, take a backup. After the update, run a health check. If the health check fails, trigger an alert. This workflow runs unattended for routine updates after you have confidence in the test gate. It is not a replacement for the 4-stage gate. It is the delivery mechanism for Stage 4 after the gate has passed.
InstaWP
InstaWP is useful for Stage 1 and for rapid reproduction of client-reported bugs. It spins up a temporary WordPress environment from a URL in under 60 seconds. You can share the environment URL with a developer or a client for review. For the 4-stage gate, InstaWP fits the Stage 1 use case when you need a clean environment quickly and do not want to maintain a persistent local Docker stack.
It is also valuable for the specific case of reproducing a bug that only appeared in Stage 3 or 4. Clone the canary site’s configuration into InstaWP, reproduce the issue, and fix it without touching the canary site’s live environment. This keeps your diagnostic work isolated from the already-deployed state.
WP-CLI Snapshots
WP-CLI’s db export command is the foundation of the pre-update snapshot workflow for sites you manage via command line. A snapshot script that exports the database, compresses it, and writes it to a timestamped backup directory takes thirty seconds per site. For a portfolio of forty sites, that is twenty minutes of snapshot time before Stage 4 begins. That twenty minutes has a clear ROI when you consider what a corrupted DB migration without a snapshot costs.
WP-CLI also handles the rollback. wp db import from the snapshot file, followed by wp plugin deactivate and wp plugin install --force with the previous version’s zip, returns a site to its pre-update state in under two minutes. Having that command sequence documented and tested before Stage 4 starts is the pre-staged rollback plan in practice.
Common Failure Modes the Gate Catches
Running this gate across 30+ plugin releases has produced a short list of failure modes that show up repeatedly. Knowing the patterns makes the monitoring checklist more effective, because you know exactly where to look.
DB Migration Timing Failures
The most common Stage 2 failure is a DB migration that assumes a table column does not exist yet, but that column already exists in older installations that ran a previous migration at a different time. This happens when a plugin ships a migration in version 2.3, then ships an updated migration in version 2.7 that overlaps with the first one. Fresh installs work fine because neither migration has run. Old installs that have run the 2.3 migration hit a duplicate column error.
The fix is always the same: check with $wpdb->get_var before altering. But the failure only surfaces on real databases with the migration history, not on fresh test installs. Stage 2’s real-data clone is the only environment where this class of bug is reliably caught.
Autoload Bloat
Autoloaded options load on every WordPress request. A plugin that adds a large serialized object to wp_options with autoload = yes is adding that object to the memory overhead of every page load, including pages that never use that option. We have seen plugins add 400KB+ to the autoload payload in a single update. That does not surface in synthetic testing because the test database is clean. It surfaces on production databases where the option already has accumulated values from previous versions.
The Stage 2 check catches it: run wp option list --autoload=yes --format=json before and after activation, compare total sizes. If the diff is over 50KB, investigate before moving to Stage 3.
Conflict with Theme Overrides
Theme child themes often override plugin templates by copying them to the child theme’s directory. When a plugin update changes the template structure, the old child theme override no longer matches. The result is a silent rendering failure: the page loads, but the layout is broken or a UI element disappears because the override is rendering the old template structure against the new plugin logic.
This failure mode does not appear in generic staging environments because generic staging environments do not have the client’s child theme. It appears in Stage 2 and Stage 3, because those stages use the actual client environment with the actual child theme. This is the reason Stage 2 must use a real client clone, not a clean WordPress install.
Cron Loop From Missed Action Deregistration
A plugin that renames a recurring scheduled action without deregistering the old hook slug leaves both versions running. The background job load doubles on every cycle. On a high-volume site using Action Scheduler, this compounds fast across days. We caught one case where a BuddyPress component update introduced a renamed notification hook that duplicated the cron, resulting in 1400 scheduled actions queuing up over 72 hours. Stage 3’s scheduled action monitoring check caught it at hour 24.
When to Skip the Full Gate: Security Patches
Security patches are the one legitimate exception to the full 4-stage gate. When a plugin ships a patch for an authenticated SQL injection, a privilege escalation, or a stored XSS, the risk calculus inverts. The risk of deploying an unvetted update is lower than the risk of leaving a known vulnerability open on forty client sites while you run a two-day canary window.
The expedited path for security patches: Stage 1 (15 minutes of static analysis and a smoke test), then direct Stage 4 rollout with pre-staged snapshots. Skip Stage 2 and Stage 3. This is not a comfortable compromise. It is a deliberate risk trade-off. The backup-before-update discipline is non-negotiable in this path precisely because you are skipping the canary window. If the security patch introduces a regression, your rollback from snapshot needs to be fast.
The practical trigger for the expedited path: a CVE assigned to the plugin, or a disclosure from the plugin author that references privilege escalation, authentication bypass, SQL injection, or remote code execution. General “security improvement” changelog notes do not warrant skipping Stage 2 and 3. That language is often used for hardening work, not active vulnerability patches.
After an expedited Stage 4 rollout, do run Stage 2 retroactively on the updated plugin. You want the staging clone to reflect what is now on production, and you want to confirm no migration issue was introduced by the security patch. This retrospective check closes the loop and keeps your staging environment current with production.
Building the Gate Into Agency Operations
The 4-stage gate described here is not a one-person operation once you have the tooling in place. A junior developer can run Stages 1 and 2 with a documented checklist. A QA handoff note summarizing Stage 2 findings takes five minutes to write. The senior developer reviews the Stage 3 monitoring results and makes the Stage 4 go/no-go call. The Stage 4 rollout via MainWP runs with minimal supervision once the pre-update snapshots are verified.
The training component matters. At Wbcom Designs, we use the gate as a teaching framework. A developer running Stage 1 for the first time learns what PHPStan level 5 actually catches and why WPCS output escape rules exist. A developer running Stage 2 for the first time sees what six years of accumulated meta looks like and learns to read the autoload size diff. The gate is process and curriculum at the same time.
Cross-link: the agency services model we run at Wbcom Designs, where this gate is part of how we deliver maintenance contracts, is described at wbcomdesigns.com/services. If you are evaluating whether to build this gate in-house or to work with a team that already runs it, that page covers the managed maintenance offering.
The gate takes time to build. The first two or three plugin releases through the full process will feel slow. The fourth feels normal. By the tenth, the manual steps are muscle memory and the tooling handles the batch work. The investment pays back on the first incident it prevents, and in a portfolio of forty client sites shipping plugins regularly, that incident is not a matter of if. It is when.
A Note on AI-Assisted Testing in This Workflow
Since vapvarun.com covers AI tooling for WordPress development, it is worth noting where AI fits into this gate and where it does not. The broader picture of AI tools for WordPress plugin development covers the build side of the equation. This piece is about the gate that protects production after the build. AI code review (Claude, Copilot) is useful as a Stage 1 supplement: paste the plugin’s diff from the previous release and ask for an analysis of any new hooks, new DB operations, or new scheduled actions. This surfaces issues that PHPStan does not catch because they are semantic rather than syntactic. A new add_filter with a closure that references an external API might be fine on its own but a problem in the context of the client’s caching setup.
AI does not replace Stages 2 and 3. No AI tool can tell you what six years of custom post meta on a real client database looks like. No AI tool can tell you whether the client’s child theme override still matches the updated plugin template. Real data and real environments are irreplaceable for those failure modes. The gate stays the gate.
What AI does well in this context is documentation and triage. After a Stage 3 canary review, pasting the PHP error log and the scheduled action diff into Claude produces a triage summary in two minutes instead of twenty. For a deeper look at how custom AI agents fit into the WordPress plugin development workflow beyond gate monitoring, that post covers the full repo structure. Used in the gate, AI is a signal processor, not a replacement for it.
The 4-stage gate is not a premium service feature. It is the baseline for responsible plugin management at any scale beyond a handful of sites. The tools are free or low-cost. The process is documentable and teachable. The ROI is clear the first time a migration failure that would have broken fifteen production sites gets caught in a 30-minute Stage 2 review on a staging clone instead.